
Some ideas to encourage a Noticing frame of mind.
In the early stages of building your students’ learning power your role is to; make them aware of the behaviour; talk about it (what, how, why, when, if); celebrate its use; give opportunities to practise it, both in lessons and elsewhere; reflect on it to improve it. This staged start is reflected below…
- Firstly… make students aware of the use and importance of noticing…when, where, why, how they are or could be doing it
- Then… explore noticing a little more through the language of noticing
- Try… using noticing as a lesson starter to tune students into using it
- Then start… blending noticing into the way you teach the content. Use specific noticing strategies to deepen content understanding.
- Ensure… students reflect on the success or otherwise of their noticing frame of mind.
1. Make students aware of Noticing
How you make your students aware of the words that describe the behaviour and why it is important to use it.
*Give time to think … and share ideas


What do experts notice? – A painter will notice subtle differences in colour, shape or texture. What about other experts … gardeners, doctors, musicians, drivers, sports-people, actors, cooks, mechanics?
Choose a couple of experts from the list or from your own ideas and think about what they notice and how and why they might have learned this.
*Introduce games that require noticing behaviours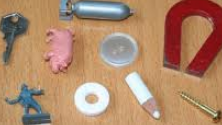

For example… use the familiar Kim’s game where students have to look carefully for a given time and then try to remember the group of articles. This simple format has numerous variations…what’s missing, what’s been added, what’s the odd one out?
Introduce intriguing pictures to provoke noticing

2. Explore the language of Noticing
How you might extend the language and understanding of this behaviour
Discuss noticing others

Invite some students to be Learning Detectives. Task them with watching how students play team games. Their job is to watch out for how to do the activity best, what works and what doesn’t work. You will need to model this regularly, it won’t matter whether they are throwing bean bags into buckets, jumping through hoops or balancing on bars, the noticing and coaching will make a real difference to their learning. If possible capture examples of effective learning on camera / video. Build the outcomes into a display that helps all students to become more aware of the effective habits of others.
Extend the language of noticing

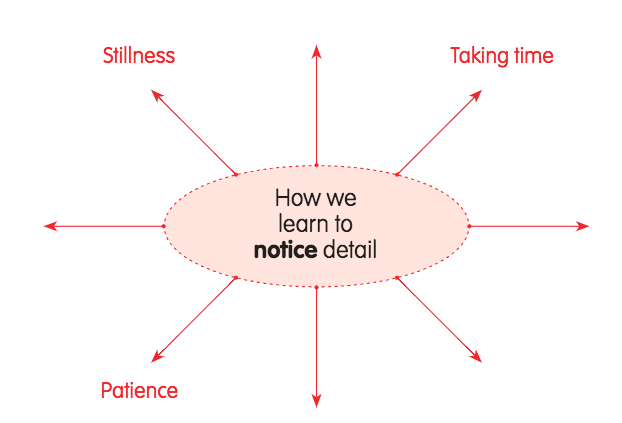
Collect words that tell you how people learn to notice detail.
Relate noticing to well-known sayings
What do we mean when we say …
Eagle-eyed.
I’ve gone through it with a fine-tooth comb.
Keep your eyes peeled
3. Use Noticing as a lesson starter
Use a quick starter to key your students into the learning behaviour you want to concentrate on in the lesson. i.e. here you are starting up their noticing behaviour
Intriguing Images
 For example have an intriguing picture ready on the whiteboard before the lesson starts. Students look forward to looking carefully at pictures where all is not as it seems.
**Finding shapes


Offer students a random set of dots (or picture of the night sky). Invite them to seek items such as:
- A letter of the alphabet
- An animal
- A regular shape
- A face
- Or something linked to the content of the forthcoming lesson
As you develop greater understanding of noticing you will need to design learning activities which, by their very nature, will deepen students’ tendency to Notice AND their understanding of the content.
Here is an idea where, by using noticing, students will gain an understanding of the content AND will develop a Noticing habit.
4. Focus on Noticing as a learning strategy
Draw out the noticing behaviour being used in a thinking routine.
Visible Thinking Routine
See, Think, Wonder:
- Invite students to make an observation (see) about an object (artwork, image, artifact) or topic.
- Follow up with what they think might be going on. Encourage backing up their interpretation with reasons.
- Ask students to think about what this makes them wonder about the object or topic.
- The routine works best when a student responds by using the three stems together at the same time, i.e., “I see…, I think…, I wonder…”. If not you need to scaffold each response with a follow up question for the next stem.
This routine encourages careful observations and thoughtful interpretations. It helps stimulate curiosity and sets the stage for inquiry. Use it at the beginning of a new unit to motivate student interest. Try it with an object that connects to a topic during the unit of study. Use the routine with an interesting object near the end of a unit to encourage students to further apply their new knowledge and ideas. Go to visible thinking website for more examples and information about thinking routines.
And here is an idea that will help students to understand the noticing process.
5. An activity to highlight and strengthen Noticing
Design specific activities to highlight and strengthen the behaviour
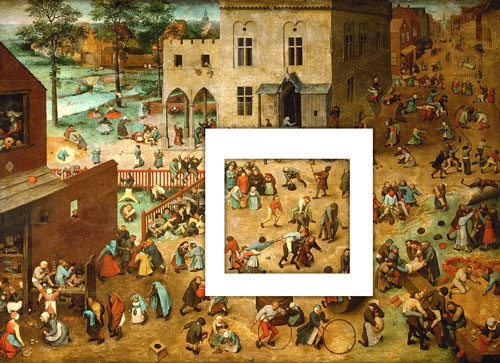
Use sets of interesting pictures together with cards with a viewing window cut into them. Students place the viewing card over the picture in seeking a range of different features. E.g. something red, made of xx, something denoting happiness, something which suggests what might happen next. It’s a good idea to look firstly for concrete features before moving on to abstract features. You could: Here is a very practical example of how you might develop the emotional climate of the classroom and make it Noticing friendly Learning mats are A4 laminated sheets that show various aspects of a learning habit. Keep them on desks/tables or as part of a wall display. A useful resource for tutor time to guide a wide ranging discussion In the early stages of building your students‘ learning power your role is to; make them aware of the capacity; talk about it (what, how, why, when, if); celebrate its use; give opportunities to practise it, both in lessons and elsewhere; reflect on it to improve it. This staged start is reflected below… How you make students aware of the words that describe the behaviour and why it is important to use it. Use games that require strategy and logical thinking. From noughts and crosses to chess, from hangman to backgammon, such games help to develop and refine reasoning skills. Many appear in the form of maths investigations and problems: Frogs; Tower of Hanoi; Nim; Connect 4; etc. Present students with coded messages and require them to work them out using their deductive skills. Start with simple substitution codes where, for example, each letter is replaced by the one after it in the alphabet. (i.e. b replaces a, c replaces b etc. etc.) Increase difficulty by using more complex ciphers. How you might extend the language and understanding of this behaviour On the one hand . . . One step at a time It adds up Use a quick starter to key students into the learning behaviour you want to concentrate on in the lesson. i.e. here you are starting up the Reasoning behaviour Cut up; Invite students to reassemble the pieces in what they think is a viable order and explain their reasons for this. Model and listen for the language of reasoning to strengthen the process. Offer students pieces of information or ideas or pictures or statements as a set of separate items, usually on cards. The subject could be: possible causes of global warming; the sayings of a religious leader; discoveries of the last 20 years; the music of Gershwin; causes of WW1; poems of Sylvia Plath; healthy lifestyle indicators; famous people etc. The criterion for ranking the cards is given or negotiated with students. For example rank the cards in order of; The point of the activity is to debate the relative merits, place them in rank order according to the chosen criterion, and to be able to explain and justify the ranking based on evidence rather than opinion. Draw out the reasoning behaviour being used in a thinking routine. This is one of many visible thinking routines to be found on the visible thinking website The first question in this routine is flexible: it is useful when looking at objects such as works of art or historical artefacts, but it can also be used to explore a poem, make scientific observations and hypotheses, or investigate more conceptual ideas (i.e., democracy). And here is an idea that will help students to understand the reasoning process. A jumble of clues to unravel and make sense of. Are there any red herrings? Did we make any assumptions, and were they valid? Did we miss anything vital? Did we ‘get it right’? Can we convince others that our answer is correct? Use Liepz and Bounz to explore how we have to use our reasoning skills to solve problems. Here is a very practical example of how you might develop the emotional climate of the classroom and make it reasoning friendly Learning mats are A4 laminated sheets that show various aspects of a learning habit. Keep them as prompts on desks/tables or as part of a wall display. A useful resource for tutor time to guide reflection and a wide ranging discussion How you make students aware of the words that describe the behaviour and why it is important to use it. …by looking at the hows of being stuck. Different sorts of stuck call for different strategies: *Develop prompts to nudge students’ self-talk: Use the ‘Learning Pit’ as a means of opening up a conversation around the feelings involved with being stuck, and the journey towards getting unstuck – the struggle. It is essential that students know: It is also worth noting that the pit is not necessarily inevitable for all students in all learning – some will fly over the pit in some topics or curriculum areas. How you might extend the language and understanding of this behaviour What message is the writer trying to convey? Consider what your students feel about being stuck, facing challenge, and risking failure. Think how you might adjust your language to re-frame their outlook. Effort is a word that teachers use frequently, but what does it mean? How might students decode this and begin to do it purposefully? Targeted Effort is now seen as a path to mastery. Students need to be aware of a connection between effort and improvement; that the sort of effort being used is causing their improvement. This is why it is important to give effort meaning. Meaning often underpins motivation which in turn drives behaviour. Model being a learner and show how you work things out, get unstuck, learn from mistakes. Take on the role of an intelligent novice Model getting unstuck at a slightly higher, more coherent and informed level than is characteristic of your students Model your ‘think alouds’ If students freeze when perplexed offer supportive questions NOT answers. Thus you are encouraging students to take over the job for themselves Remind students that uncertainty shouldn’t lead to paralysis! Give mistake quotas. Tell students you expect them to make, say 3 in a lesson. If not, the challenges they are tackling are too easy and they should move to harder ones. Explore the concept of ‘Good mistakes’ – where the student has misunderstood something thus enabling you and the student to track the issue. Offer a range of ‘good mistakes’ at the start of a lesson for students to find, explore and correct. Give time in lessons for students to Trial and Improve something. Discard ‘trial and error’. Draw out the persevering behaviour being used in a thinking routine. When a student says ‘I’m stuck’, resist the temptation to ask ‘what are you stuck on?’ – you know only too well they will probably reply ‘everything’. Better to explore ‘why’ they are stuck . . . . Encourage students to identify the cause of their stuckness. Move students from saying “I’m stuck” to ” I’m stuck because…” Naming the problem will often suggest a reasonable next step. It’s also useful to insist that students can’t call themselves ‘stuck’ unless they have tried to apply at least 1 solution. And here is an idea that will help students to understand the persevering process. A seemingly simple task that frequently leads to frustration and the need to have another go. Some students may do it fairly easily, others will give up, and some will struggle through and achieve, almost to their surprise, the desired outcome. Use the task to explore the feelings around stuck, challenge, potential distractions, and trying to achieve a goal. Use it as an opportunity to explore further with the group — what makes us give up, what helps us keep going? Learning mats are A4 laminated sheets that show various aspects of a learning habit. Keep them on desks/tables or as part of a wall display. Students refer to them during lessons, using them as prompts about the finer aspects of a learning habit that is being stretched. Use learning logs such as this to encourage students to reflect on when they did and didn’t persevere, and what happened as a consequence. Use as the basis of discussion. In the early stages of building your students’ learning power your role is to: make them aware of the behaviour; talk about it (what, how, why, when, if); celebrate its use; give opportunities to practise it, both in lessons and elsewhere; reflect on it to improve it. This staged start is reflected below… How you make your students aware of the actions and words that describe the behaviour and why it is important to use it. Ask students to; Use this to expand the range of questions used in class and to create guidelines for asking good (search) questions. Click to enlarge Create a Question Wall in the classroom to illustrate and prompt questioning. For example, the question wall might focus on student generated questions about the topic in hand. Use their questions to help to focus / shape their enquiry. Establish ground rules for asking questions e.g. speaking clearly, think before you ask…is this an important/relevant question? Do I know the answer? Get to the point. Listen to the answer. Click to enlarge Create displays to support students’ questioning skills. Go on to Create, with students, a set of questions they might ask when they are stuck. These might include; What did I do last time when . . . . ? What do I already know about this? What should I do first? And next? I am finding this tricky because . . . . Who might know? Where can I look? How you might extend the language and understanding of this behaviour Start a story with an opening line. Encourage the students to keep on asking each other Why? and giving answers until they have created a story. Opening lines can be a simple “The red van roared down the street” but lead to all sorts of questions —“Why was the van red?” “Why was it roaring?” which lead on to other ‘Why?’ questions. Vary the game by starting with a riddle or conundrum, or requiring different types of questions. Collect ideas about the purpose of questions. Relate questioning to well known sayings Use a quick starter to key students into the learning behaviour you want to concentrate on in the lesson. i.e. here you are starting up the questioning behaviour Identify a project which the class might investigate. Write a series of questions on separate pieces of cards and give each group a set of the cards. The group shuffle the cards and deal each student one card. They have to decide: Tell students: ‘In 5 minutes, ‘something’ related to the upcoming lesson will walk in. What are the three questions that we should ask it?’ Draw out the questioning behaviour being used in a thinking routine. Question Starts is a Visible Thinking Routine that provides students with the opportunity to practise developing good questions that provoke thinking and inquiry into a topic by offering a range of interesting question stems. For example: Brainstorm a list of at least 12 questions about the topic, concept or object. Use these question-starts to help you think of interesting questions: Review the brainstormed list and star the questions that seem most interesting. Then, select one or more of the starred questions to discuss for a few moments. Reflect: What new ideas do you have about the topic, concept or object that you didn’t have before? Design specific activities to highlight and strengthen the behaviour Build a three-level ‘questioning habit‘ ‘ReQuest’ is a structured process for deepening questions. For example, start with the painting The Arnolfini Wedding by Jan van Eyck: Here is a practical example of how you might develop the emotional climate of the classroom and make it questioning friendly Learning mats are A4 laminated sheets that show various aspects of a learning habit. Keep them on desks/tables or as part of a wall display. Students refer to them during lessons, using them as prompts about the finer aspects of a learning habit that is being stretched. Give students time to reflect on the questions that students ask of themselves and of others in different situations. Which of these questions, when answered, proved to be the most powerful? Why was that? Which question, if asked, would be most likely to move thinking forward? Encourage students to build a bank of powerful questions that they can refer back to when necessary. In the early stages of building your students’ learning power your role is to; make them aware of the capacity; talk about it (what, how, why, when, if); celebrate its use; give opportunities to practise it, both in lessons and elsewhere; reflect on it to improve it. This staged start is reflected below… How you make your students aware of the words that describe the behaviour and why it is important to use it. Recommend group of no more than 12-15 Use mind maps to encourage students to link and explain how information and ideas seem to be associated. Use mind mapping at the beginning, middle and end of a unit of study to show how links and understanding change as knowledge grows. Use a ‘thought shower mind map’ at the outset of a lesson to connect with prior learning and activate link making. Use in the middle to monitor shifts in understanding. Use at the end of a module of learning as a synthesising tool. Organisation: For groups of 5/6 students. Print out and photocopy the Odd One Out series of pictures. (see resource). Offer students a set of cards that need to be matched up or linked in some way. It might be: How you might extend the language and understanding of this behaviour Gather together a really good assortment of shapes: 2D and 3D shapes and different sizes and colours. Using small hoops or different coloured paper circles ask students to take turns to sort the shapes by putting them in the hoops and explain their reasoning for sorting them this way. It should be possible to rearrange the shapes in several different ways as different students take a turn. This can help the students understand that there are often many different ways to link things together. Collect words that tell you how people learn to make links. Chain reaction Cause and effect Seeing the wood and the trees Use a quick starter to key your students into the learning behaviour you want to concentrate on in the lesson. i.e. here you are starting up the link making behaviour Find two images with both similarities and differences. Invite students to work in pairs to identify at least 5 of each, and then work as a four to decide the 3 most important similarities and differences. Timings could be around 1 minute for the pair work, and 2 minutes for the work in fours. This will also support the skills of noticing, collaborating, and distilling. Identify four ‘things’ related to your own subject area – this could be 4 images, 4 words, 4 techniques, or anything else that links to your own subject and/or what students are currently learning about. Invite them to identify the odd one out, and to explain why they think this. When you can, construct lists where it is possible to justify that each of the items are, in fact, the odd one out. As you develop greater understanding of making links you will need to design learning activities which, by their very nature, will deepen students’ tendency to Make Links AND their understanding of the content. Draw out the making links behaviour being used in a thinking routine. This routine helps students make connections between new ideas and prior knowledge. It also encourages them to take stock of ongoing questions, puzzles and difficulties as they reflect on what they are learning. Connect: How are the ideas and information presented connected to what you already know? Extend: What new ideas did you get that extended or pushed your thinking in new directions? Challenge: What is still challenging you or confusing for you to get your mind round? What questions, wondering or puzzles do you now have? The natural place to use this routine is after students have learned something new. For example: after exploring a work of art, a theory, a method, a piece of evidence. Try it as a reflection during a lesson, after a longer project, or when completing a unit of study. The routine works just as well with the whole class, small groups or individually. This is one of many visible thinking routines to be found on the visible thinking website And here is an idea that will help students to understand the link making process. An activity to encourage students to make imaginative links between seemingly unconnected objects. Who can find the most novel / humorous / unexpected link? Are some objects not linked in any way at all? Use to explore how most things can be linked together in some way, and how making the links helps us to remember things and maybe see things in new ways. Here is a very practical example of how you might develop the emotional climate of the classroom and make it Link Making friendly. Learning mats are A4 laminated sheets that show various aspects of a learning habit. Keep them on desks/tables or as part of a wall display. A useful resource for tutor time to guide reflection and a wide ranging discussion. In the early stages of building your students’ learning power your role is to; make them aware of the behaviour; talk about it (what, how, why, when, if); celebrate its use; give opportunities to practise it, both in lessons and elsewhere; reflect on it to improve it. This staged start is reflected below… How you make your students aware of the words that describe the behaviour and why it is important to use it. Invite students to visualise, for example, a snowy mountain peak until the image fades – discuss how long this could be sustained. Now visualise hovering over the mountain and exploring the terrain by helicopter – the experience will have lasted longer. Now provide students with a guided visualisation of the mountain that triggers their imaginative faculties – discuss the features of this experience. Enable students to identify the ways of triggering their own imaginations when provided with stimuli. Invite them into a city at night, or the alimentary canal, . . . Use music to create atmosphere and stimulate imaginative thinking. Provide varied, unexpected and ever-changing visual experiences — on whiteboards, classroom walls, in ideas banks, through web-links, etc. Read vivid prose and poetry that captures details, moods and atmospheres. Encourage students to brainstorm or mind-map and keep notebooks or Post-its of interesting ideas to feed their creativity. Do this collectively and individually. Elect one student as ‘Plant of the Day’, whose job it is to suggest unlikely ideas. Show video clips of e.g. rugby or football heroes preparing to kick a ball, as well as other sports and entertainment people rehearsing ahead of action. Discuss what they are doing to ‘play the movie’ in their heads before they act. Explore occasions when this could be useful in students’ own lives. Identify the triggers and habits required when anticipating the right action. How you might extend the language and understanding of this behaviour Give students a familiar object – a pencil, hairbrush, scissors, toilet roll, cushion – whatever comes to hand. Then pose the question: ‘What else could it be?’ or ‘What could this become’ Discuss and praise the most imaginative ideas. What you are trying to develop in young learners is: Click to enlarge Collect words that tell you how people learn to imagine. In my mind’s eye Thinking outside the box Use a quick starter to key your students into the learning behaviour you want to concentrate on in the lesson. i.e. here you are starting up their imagining behaviour Provide a stem statement… A man walks into a room with a suitcase in his hand… Invite one student to carry it on. Each student continues from where the previous one left off. Or . . Create a scenario…There are no windows, water drips into a bucket, two people are seated back to back…what might be happening? What might happen next? Can you improvise the dialogue between the people? Provoke students to think ‘What if… we ran out of oil in 25 years… we lived in a two-dimensional world… we all lived for exactly 70 years… tennis balls were heavier… we had two moons…’ Encourage students to build collaborative spider diagrams that explore the possible ramifications of such eventualities. Extend the imagining in creative presentations using a variety of media. As you develop greater understanding of imagining you will need to design learning activities which, by their very nature, will deepen students’ tendency to be imaginative AND their understanding of the content. Draw out the Imagining behaviour being used in a thinking routine. Creative Questions Creative Questions is a visible thinking routine that encourages students to create interesting questions and then imaginatively mess around with them for a while in order to explore their creative possibilities: Pick an everyday object or topic and brainstorm a list of questions about it. Look over the list and transform some of the questions into questions that challenge the imagination. Do this by transforming questions along the lines of: Choose a question to imaginatively explore. Explore it by imaginatively playing out its possibilities. Do this by: Writing a story or essay, drawing a picture, creating a play or dialogue, inventing a scenario, conducting an imaginary interview, conducting a thought experiment . . . . Reflect: What new ideas do you have about the topic, concept or object that you didn’t have before? For more detail on Creative Questions, visit the visible thinking website And here is an idea that will help students to understand the imagining process. Design specific activities to highlight and strengthen the behaviour Click to enlarge What has happened here? Good guy or bad? Can we see any colours? Hear any sounds? Imagine being there…. A quick way to activate the Imagination and explore how we use our senses to imagine. To support students to use their imaginations using all of their senses, How might you use the technique? Here is a very practical example of how you might develop the emotional climate of the classroom and make it Imagining friendly Learning mats are A4 laminated sheets that show various aspects of a learning habit. Keep them on desks/tables or as part of a wall display. Click to enlarge A useful resource for tutor time to guide a wide ranging discussion. In the early stages of building your students’ learning power your role is to; make them aware of the behaviour; talk about it (what, how, why, when, if); celebrate its use; give opportunities to practise it, both in lessons and elsewhere; reflect on it to improve it. This staged start is reflected below… How you make students aware of the words that describe the behaviour and why it is important to use it. Set up interviews with people who can do something really well. Develop a series of questions with students to uncover exactly what the ‘expert’ does. E.g. What sort of preparation is there? What resources are needed? What does it feel like? What sort of thinking, habits of mind, values or beliefs are helpful? Create a checklist of key aspects to imitate. Extend with students in the role of real or imaginary expert, encouraging them to assess their own subconscious knowledge of how to succeed. Set aside an area of display where students are asked to share any strategies or ‘top tips’ that they have found particularly helpful in their own learning. Set up a Helpful Habit board for tips from students to others about habits which might help them to achieve their long or short term goals. For those offering the ‘top tip’ it is a distilling activity, but the resulting gallery of ‘top tips’ invites students to adopt the successful strategies of others. Challenge students to make as many things as they can from the objects, using all of them but nothing else. Discuss examples of particularly imaginative / effective use of materials and whether these ideas can be used in another context. How you might extend the language and understanding of this behaviour Use language to encourage thinking about capitalising. Build these into your learning language: click to enlarge Collect words and phrases that tell you how people learn to Capitalise on what is around them. There is more than one way to skin a cat Making the best of a bad job A bit ‘Heath Robinson’ Use a quick starter to key students into the learning behaviour you want to concentrate on in the lesson. i.e. here you are starting up the Capitalising behaviour Talk to students frequently about where they might find information or help. Offer students a rich and varied curriculum so that they can start to appreciate that they are learning from lots of different sources using a range of learning strategies. To get students thinking about how resources can be used in many different ways. How will you find that out ? This routine helps students to take stock of what they need to find out and to consider the strategies they might use to achieve it. It encourages metacognitive thinking about which learning strategy is most likely to lead to success. The routine has two questions: The natural place to use this routine is when students understand what they need to find out but before they make a choice from a range of learning strategies. And here is an idea that will help students to understand the capitalising process. Design specific activities to highlight and strengthen the behaviour The activity leads to a recognition of the range of resources that can be called upon when seeking to acquire new knowledge, understand the unfamiliar and respond to challenges. Here is a very practical example of how you might develop the emotional climate of the classroom and make it capitalising friendly Learning mats are A4 laminated sheets that show various aspects of a learning habit. Keep them on desks/tables or as part of a wall display. A useful resource for tutor time to guide reflection and a wide ranging discussion. In the early stages of building your students’ learning power your role is to; make them aware of the capacity; talk about it (what, how, why, when, if); celebrate its use; give opportunities to practise it, both in lessons and elsewhere; reflect on it to improve it. This staged start is reflected below… How you make students aware of the words that describe the behaviour and why it is important to use it. An idea to get students thinking about collaboration. In pairs – Think of a time when each of you has learned something with others. Take turns to interview each other about; Give students challenges which can only be achieved through collaboration. For example; Ask a group of 10 to stand on a bench and put themselves in order of height without anyone stepping off and on again. They will have to work cooperatively as a team to meet this challenge. An activity that enables students to recognise that working collaboratively means everyone having a role in success. Four teams of seven. Explain: “Create a machine with moving parts using yourselves. Each of you is to be part of the machine or something that the machine makes. When you have made it work you will demonstrate it working to the class. You have 10 minutes. The class will try and guess what your machine makes.” Debrief...how the group work together. Whether a leader emerged? How decisions were made about what the machine should make. How it was decided when the machine would start. How machine parts were assigned. What different people contributed to the team effort? What has been learned about working in a team? How you might extend the language and scope of collaborating in a team click to enlarge Open up a conversation about different team roles with students. Many students will, initially, have a preferred role, but over time encourage them to try out other roles to broaden their team working skills. Experiment with allowing individuals to choose their own roles, assigning roles yourself, and allowing teams to assign roles. Use a quick starter to key students into the learning behaviour you want to concentrate on in the lesson. i.e. here you are starting up the collaborating behaviour An activity that requires students to share what they have in order to finish the task. Use this also to encourage them to think about what they are trying to achieve. Use harder jigsaws, or groups of information, with older students. Have students work in pairs for 5 minutes to begin a draft answer to a tricky question. Once time is up, partially completed answers are passed to the next pair to be built upon, refined or redrafted, and the process is repeated as many times as necessary. At the end of the process, answers are returned to the original pair who are tasked with using all of the suggestions to draft their final polished version of the answer. For more on this, read The Teacher’s Toolkit (Paul Ginnis), pages 139/140 Improve collaborating behaviour through the use of a thinking routine. Think – Allow plenty of individual think time to engage with the issue. Pair – Students then try out their ideas, (discuss, clarify, challenge) with a ‘Learning Partner’. Share – The pair share with another pair, and subsequently with the whole class to arrive at a range of possible answers. They come to know and shape their views by collaborating with others. Use as a simple strategy to prepare students for working together in teams, having first thought it through for themselves (Think), checked their ideas out with a trusted friend (Pair), before moving on to contributing to a group (Share). At each point students are exposed to the views of others which encourages them to revise and refine their initial thinking. And here is an activity that will help students to understand more about collaboration and team work. Design specific activities to highlight, strengthen and improve collaboration itself. Use collaboration to help students to better understand the content. This take on a classic exercise encourages students to listen, share ideas and, hopefully, come to an agreed solution. Here is a practical example of how you might develop the social climate of the classroom and make it collaboration friendly Learning mats are A4 laminated sheets that show various aspects of a learning habit. Keep them on desks/tables or as part of a wall display. Students can refer to them during lessons as prompts about the finer aspects of collaborating and later for self-reflection on what they have used, whether it was successful and how to improve it. click to enlarge Me-now! is a self-reflective tool to focus a discussion. It is useful in encouraging students to consider several aspects of the learning behaviour in question. There are some fairly sophisticated attributes in the list. How am I at collaborating? Answer with Usually/Sometimes/Rarely/Don’t Know In the early stages of building your students’ learning power your role is to; make them aware of the capacity; talk about it (what, how, why, when, if); celebrate its use; give opportunities to practise it, both in lessons and elsewhere; reflect on it to improve it. This staged start is reflected below… How you make your students aware of the words that describe the behaviour and why it is important to use it. An activity to encourage good listening skills. A short listening activity to help students to recognise that attentive listening enables them to centre themselves, focus on what is really happening and take possession of themselves as learners. For example: Play a two-minute scene from a film, without the visuals. Listen for clues in sound effects, voices, soundtrack. Predict / speculate what is happening. Show the film and attend to the way in which sounds contributed to meaning. How you might extend the language and understanding of this behaviour Model different tones of voice. Start with ones that are easy to recognise and understand, like a cross voice or a scared one. Gradually build up this repertoire of voices and use them in stories and songs. Talk about when we use these different tones of voice and why. Ask the children to listen carefully to the way people talk at different times and spot their feelings. Expand further by inventing voices that you can use for different activities: imagine the voices for different toys or puppets you may have in the classroom; count like robots of a day; recite a rhyme like the big bad wolf. The children will have fun inventing a wide and wonderful assortment of voices whilst refining their listening skills. Collect words that tell you how people learn to listen attentively. Being all ears Listening between the lines Use a quick starter to key your students into the learning behaviour you want to concentrate on in the lesson. i.e. here you are starting up their listening behaviour. Use centring activities at the beginning of lessons to focus minds before the learning begins. Play music and ask students to focus on the associations that it conjures about places, people, moods and atmospheres. Read a sentence or statement without expression, then read it again, once, with changes; no further repetition. Students have to spot the changes. Play recordings of, for example: Draw out the listening behaviour being used in a thinking routine. What did (s)he say ? This routine helps students to listen carefully for and to understand important factual information. It also encourages them to distil key points as they listen for key messages. The routine has two questions: The natural place to use this routine is before students are about to listen to something – it could be a video, a You Tube clip, or even teacher exposition. The routine works just as well with small groups or individually. And here is an idea that will help students to understand the listening process. Design specific activities to highlight and strengthen the behaviour A short and enjoyable task that can only be achieved through careful explanation and attentive listening. Use it to stimulate a discussion about jumping to conclusions based on partial information. *Here is a very practical example of how you might develop the emotional climate of the classroom and make it listening friendly Learning mats are A4 laminated sheets that show various aspects of a learning habit. Keep them on desks/tables or as part of a wall display. A useful resource for tutor time to guide reflection and a wide ranging discussion. *Viewing Frames:
6. Reflect on Noticing
Make reflecting on noticing part of everyday lessons
Learning Mats
*Alert students to noticing across subjects
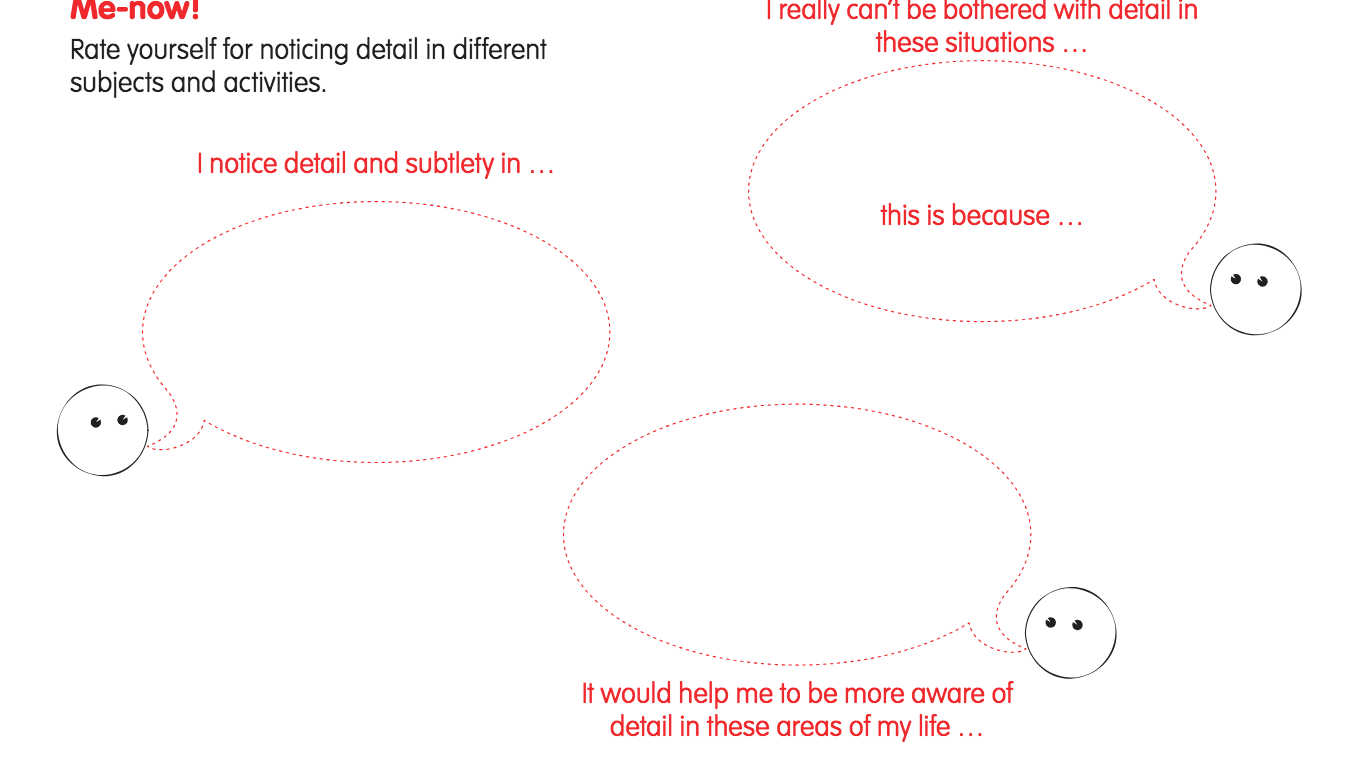
What do you think?
Make a note of…

NB. None of the suggestions above will lead to instant understanding in students nor instant changes of behaviour. You will need to drip them in over time and keep building and refreshing your language of learning.
Some ideas to encourage a Reasoning frame of mind.
1. Make students aware of Reasoning
Draw out reasoning in Strategy Games

Code Breaking

2. Explore the language of Reasoning
Explore the meaning of reasoning
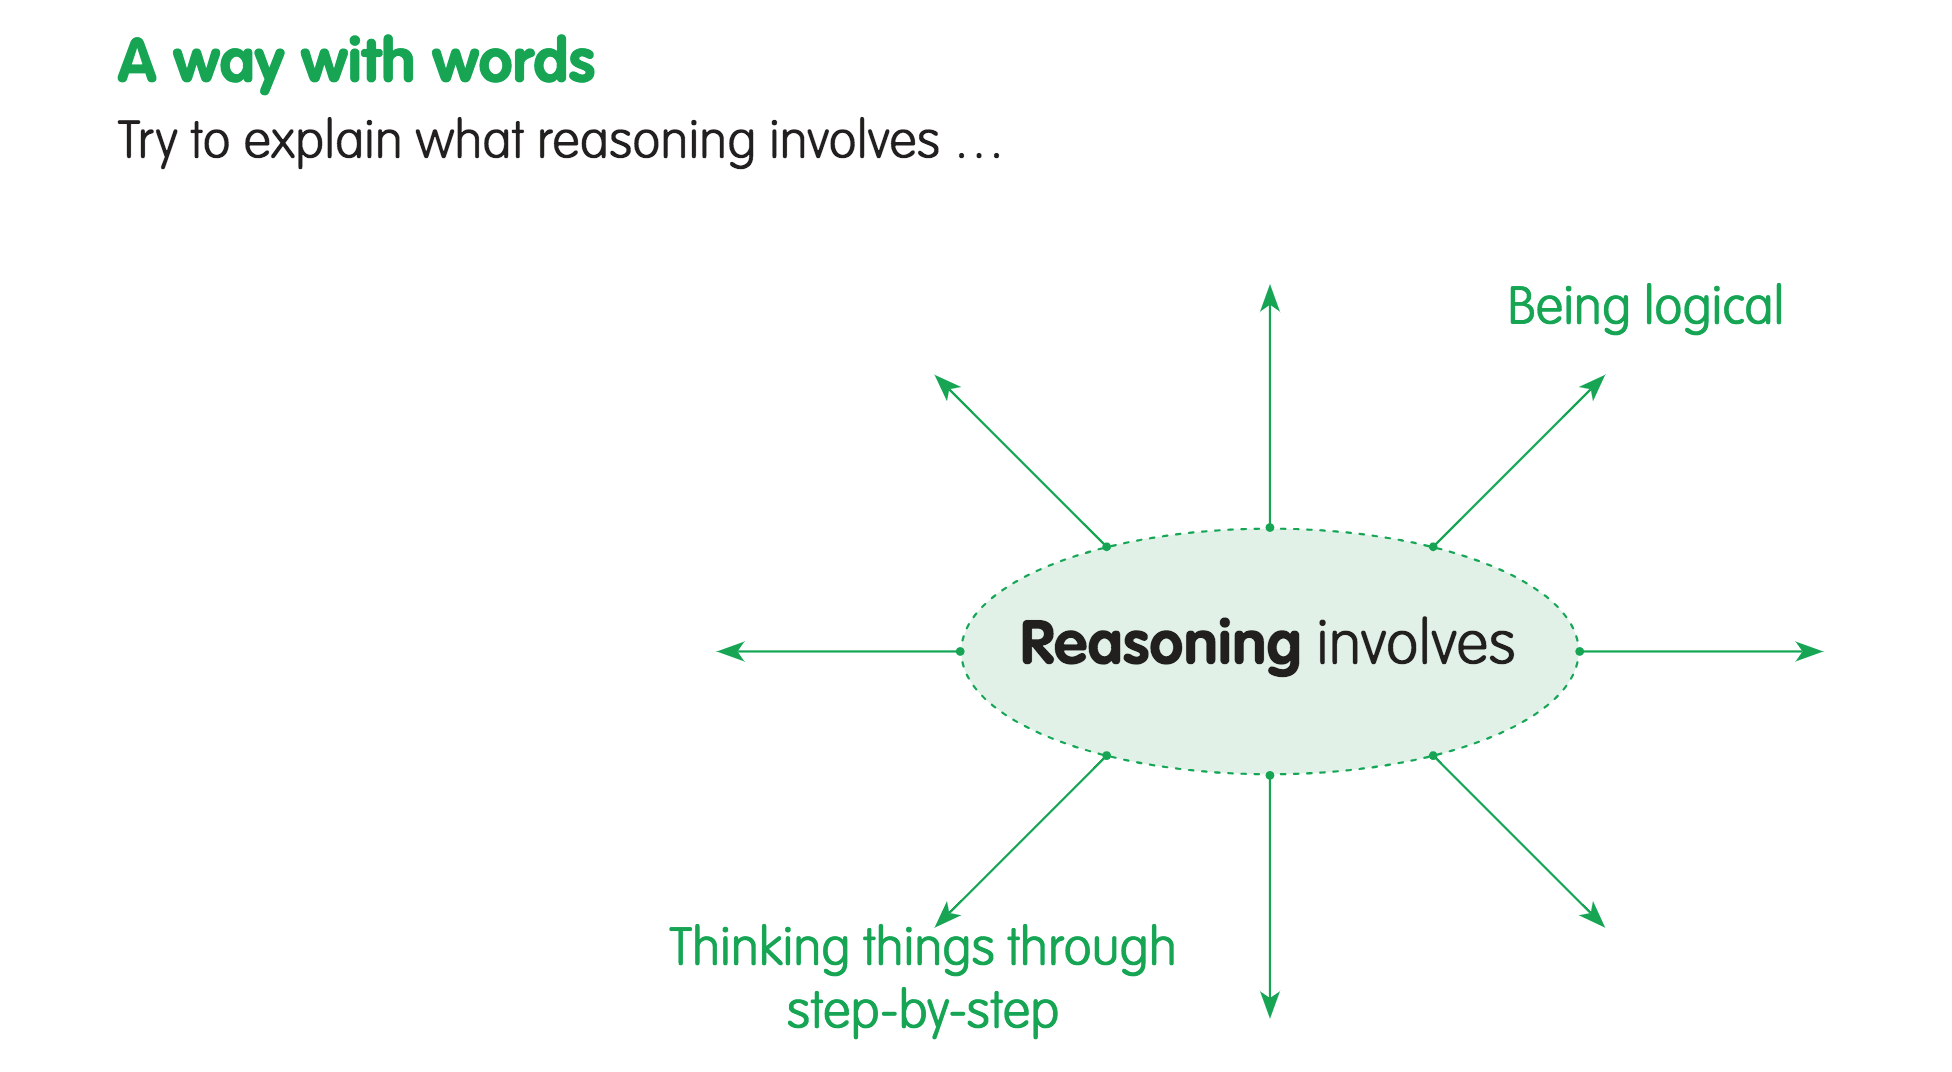 Collect words that tell you how people learn to Reason.
Relate reasoning to well-known sayings
What do we mean when we say …
3. Use Reasoning as a lesson starter
Sequencing

Ranking

As you develop greater understanding of reasoning you will need to design learning activities which, by their very nature, will deepen students’ tendency to Reason AND their understanding of the content.
4. Focus on Reasoning as a learning strategy
Visible Thinking Routine
The first question invites students to describe what they notice, see or know, but it is the supplementary question (What makes you say that?) that requires them to build explanations. It promotes evidence-based reasoning and when the students share their interpretations it encourages them to understand alternatives and multiple perspectives.5. An activity to highlight and strengthen Reasoning
Liepz & Bounz
Observation Sheet
6. Reflect on Reasoning
Make reflecting on Reasoning part of everyday lessons
Learning Mats
A Learning Log to alert students to Reasoning across various aspects of their learning lives
What do you think?
Make a note of…
NB. None of the suggestions above will lead to instant understanding in students nor instant changes in their behaviour. You will need to drip them in over time and keep building and refreshing your language of learning.
Some ideas to enable students to become more perseverant
1. Make students aware of Persevering
Explore strategies for getting unstuck…
Introduce the Learning Pit to explore the stuck/struggle journey
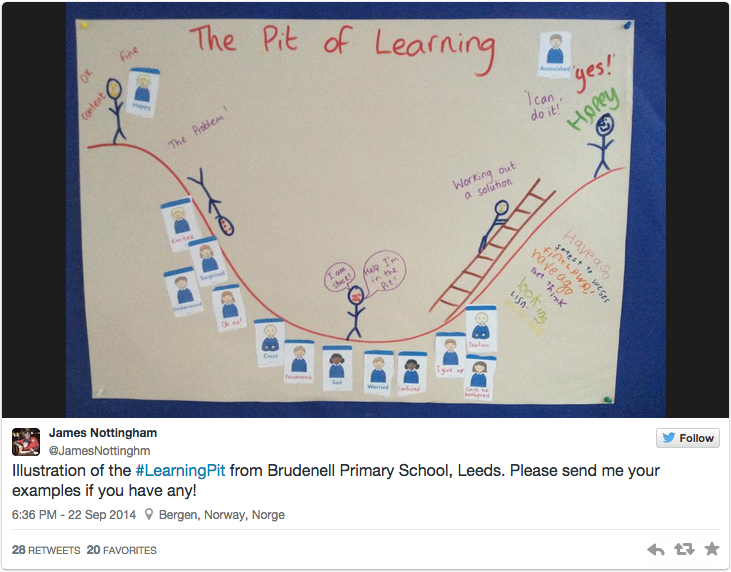
2. Explore the language of Persevering
Develop ‘stuck prompts’ together
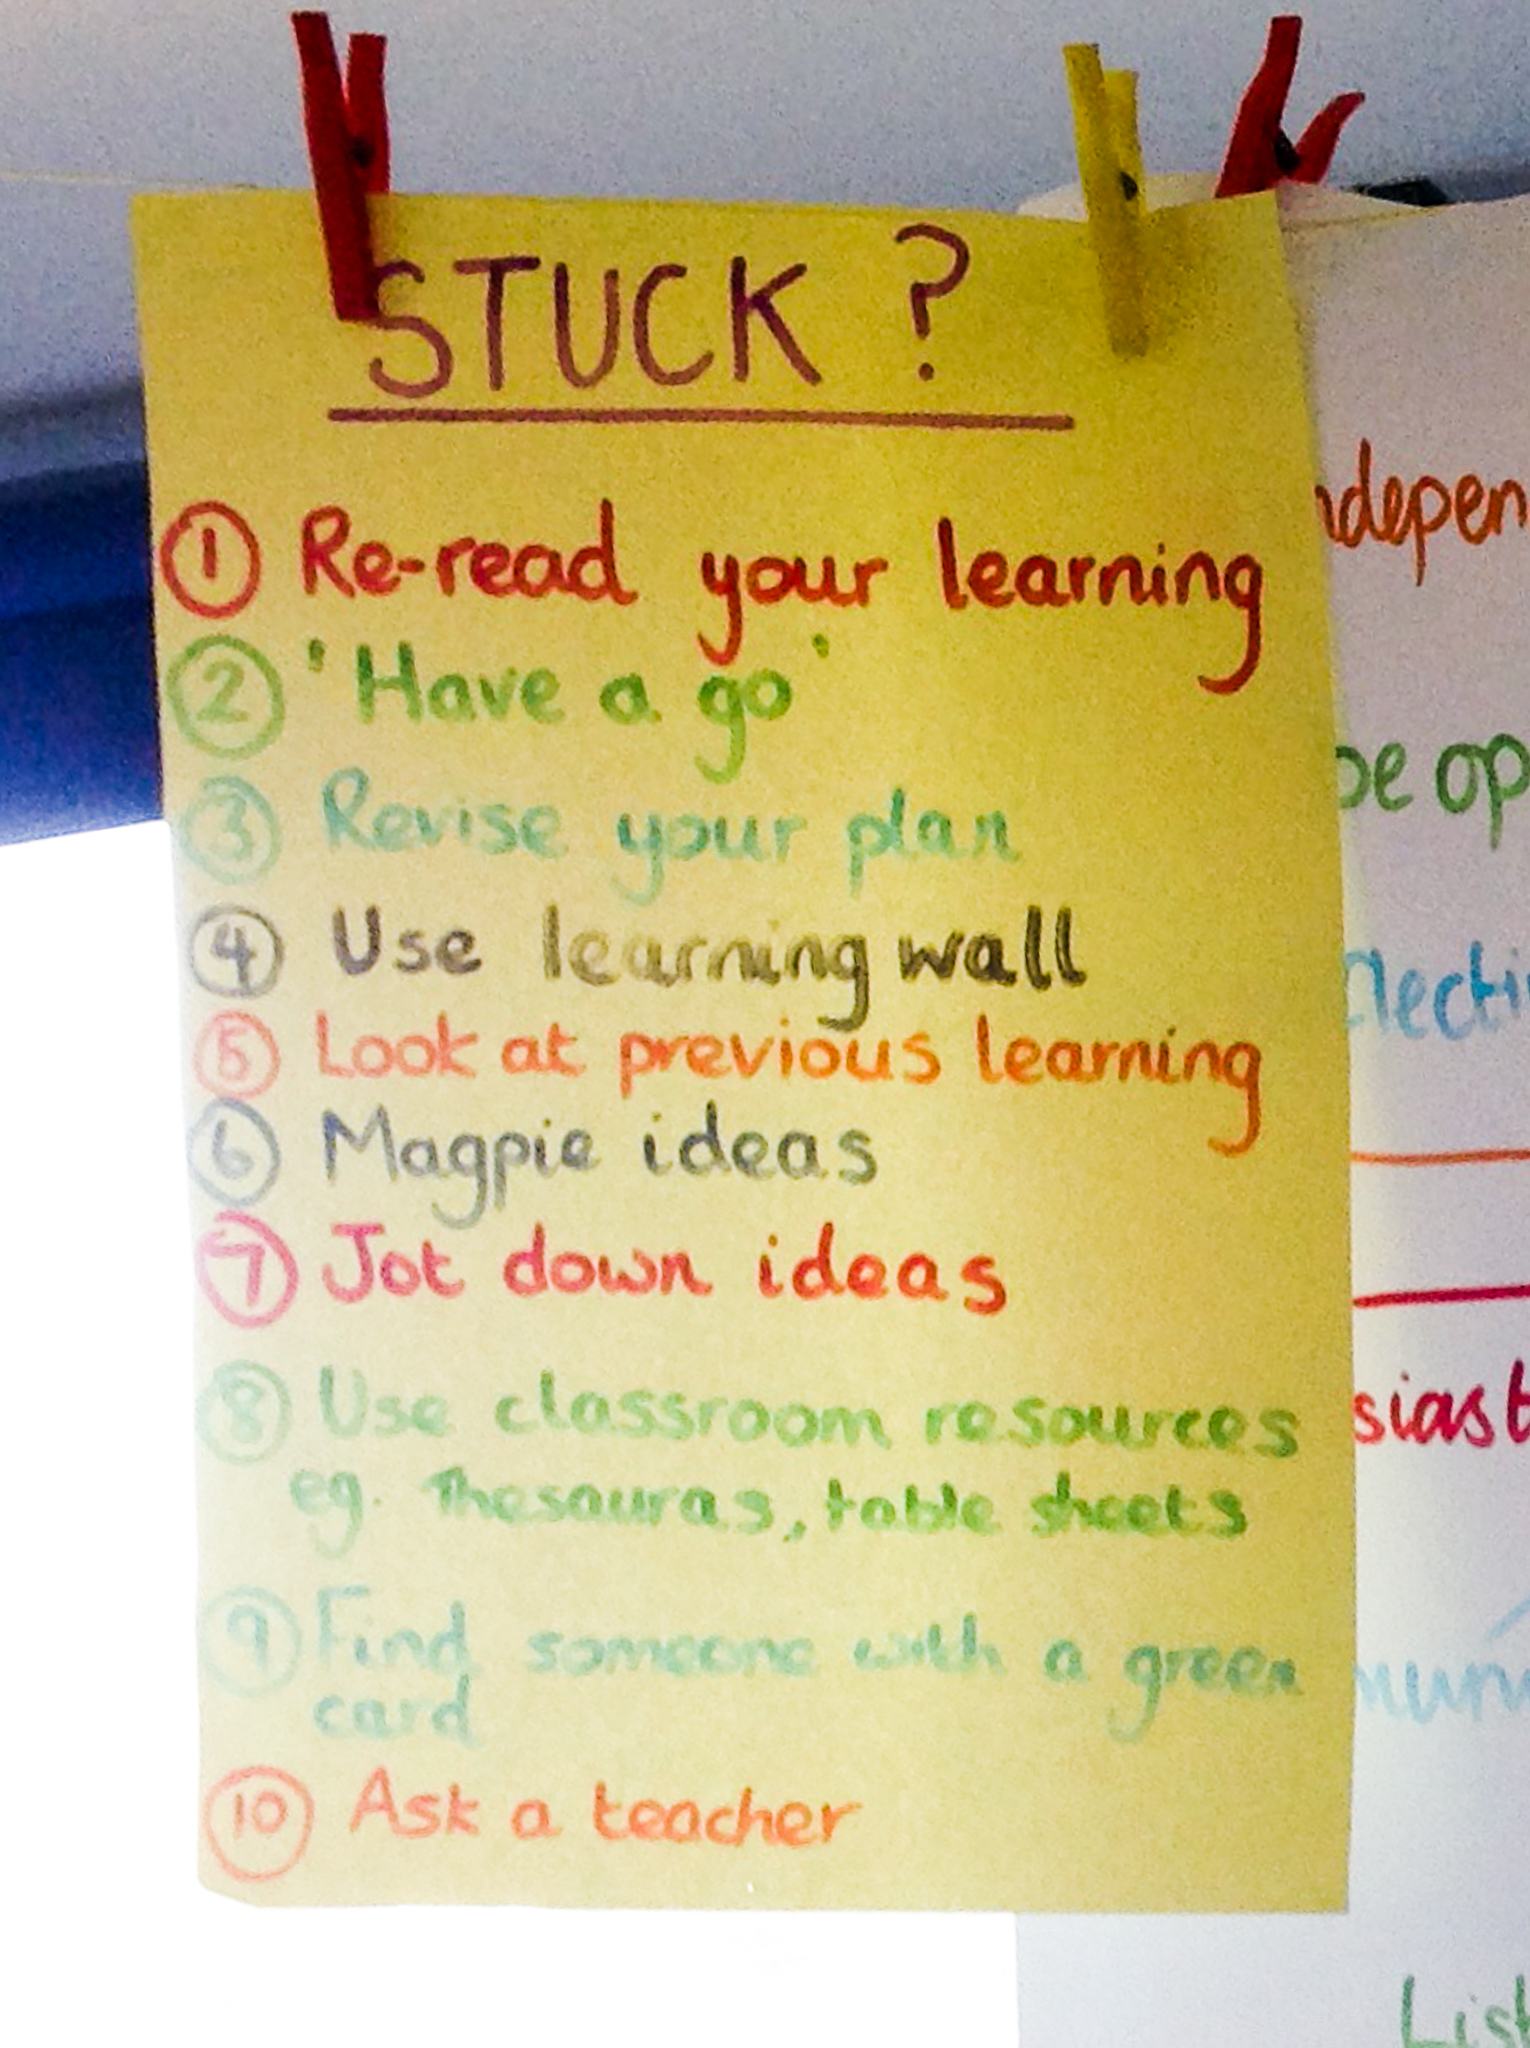
Extend the language of persevering
Consider the postage stamp: its usefulness consists of the ability to stick to one thing ‘til it gets there
Fall seven times, stand up eight
Perseverance is the hard work you do after you get tired of doing the hard work you already did
3. Counter attitudes that limit perseverance; strengthen the positives.
Explore the meaning of effort
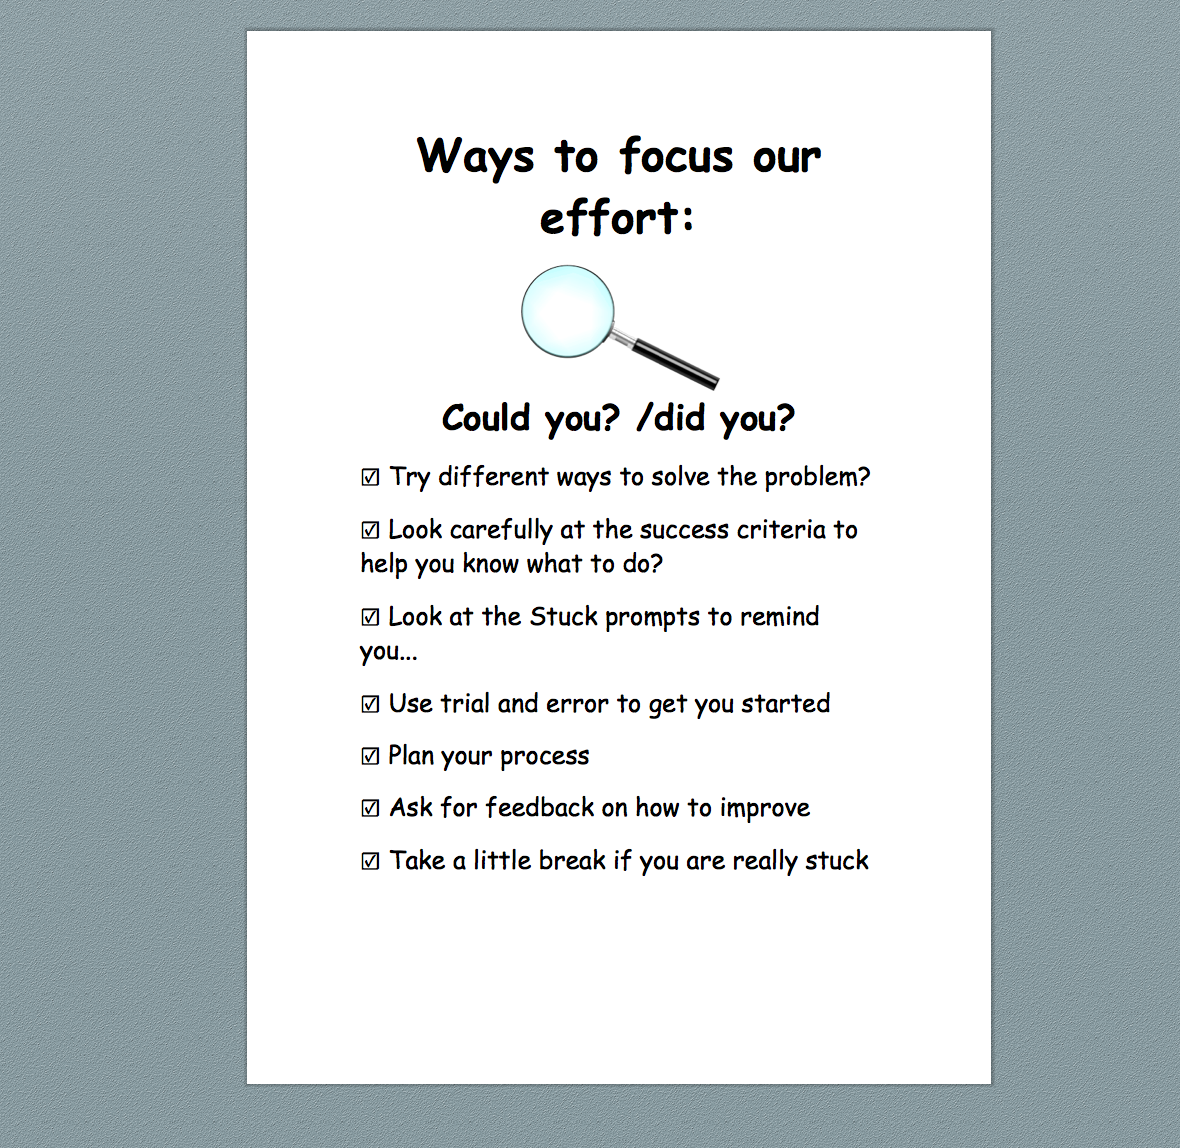
Model getting unstuck
Re-frame Challenge
Give Mistakes a status, a key role in learning
4. Focusing on Persevering as a learning strategy
Visible Thinking Routine
From ‘I’m stuck ‘ To ‘I’m stuck because …‘

5. An activity to highlight and strengthen Persevering
*Use Origami to help students explore keeping going with a challenge.
6. Reflecting on Persevering
Make reflecting on persevering part of everyday lessons
Learning Mats
*A Perseverance Learning Log
What do you think?
Make a note of…
NB. None of the suggestions above will lead to instant understanding in students nor instant changes in their behaviour. You will need to drip them in over time and keep building and refreshing your language of learning.
Some ideas to enable students to become better questioners.
1. Make students aware of Questioning
*Engage with a ‘mystery’ object in a bag
 Invite students to ask questions to find out what the mystery object is.
Question focused research

*Put questions on display
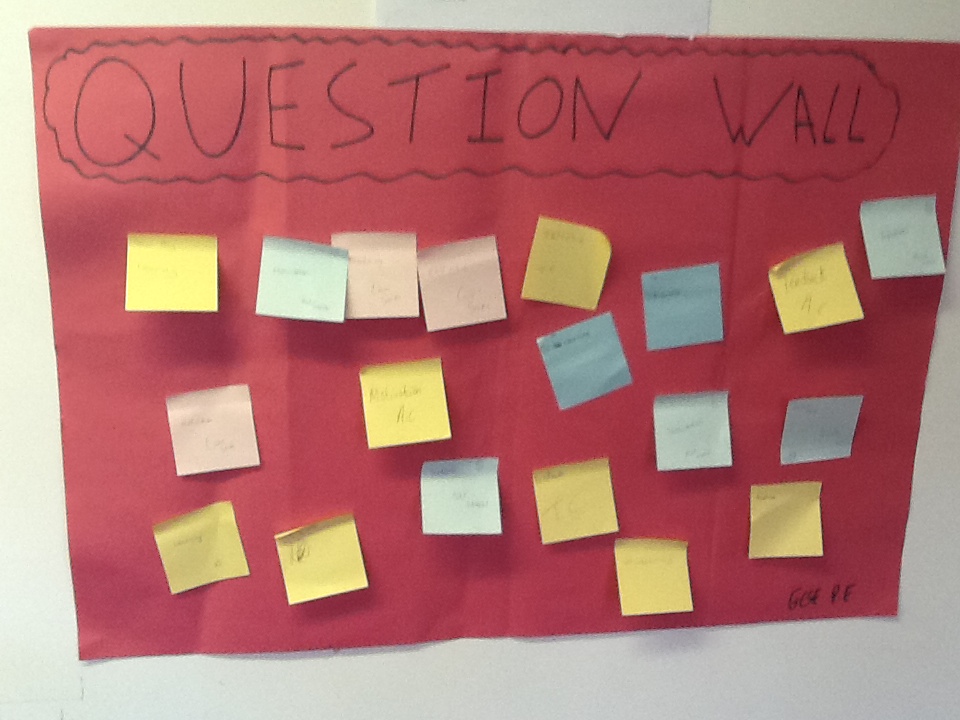
Questions on display

2. Exploring the language of Questioning
*The why game

Extend the language of questioning

What do we mean when we say …
Curiosity killed the cat
I need to get to the bottom of this
More questions than answers
3. Using Questioning as a lesson/project starter
*Is your question important?
some are irrelevant in the context*Questions you would like to ask
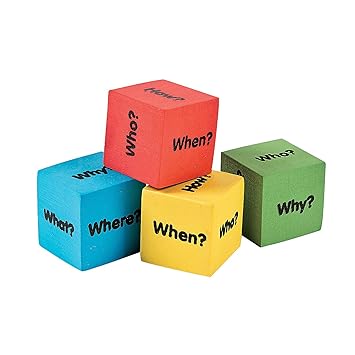
Here is an idea where, by using questioning, students will gain an understanding of the content AND will develop a questioning habit.
4. Focus on Questioning as a learning strategy
Visible Thinking Routine

5. An activity to highlight and strengthen curiosity
*An activity to learn about questioning

6. Reflect on Questioning
Make reflecting on questioning part of everyday lessons
Reflective Learning Mats
*Reflect and build a powerful Question Bank
NB. None of the suggestions above will lead to instant understanding in students nor instant changes in their behaviour. You will need to drip them in over time and keep building and refreshing your language of learning.
Some ideas to encourage a Link Making frame of mind.
1. Make students aware of Making Links
*My Grandma went shopping . . .
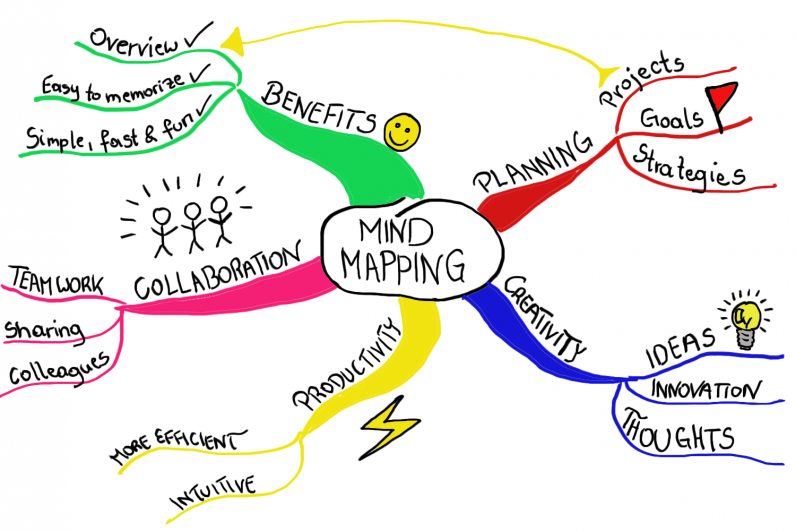
*Mind Maps for link making
Think and Link
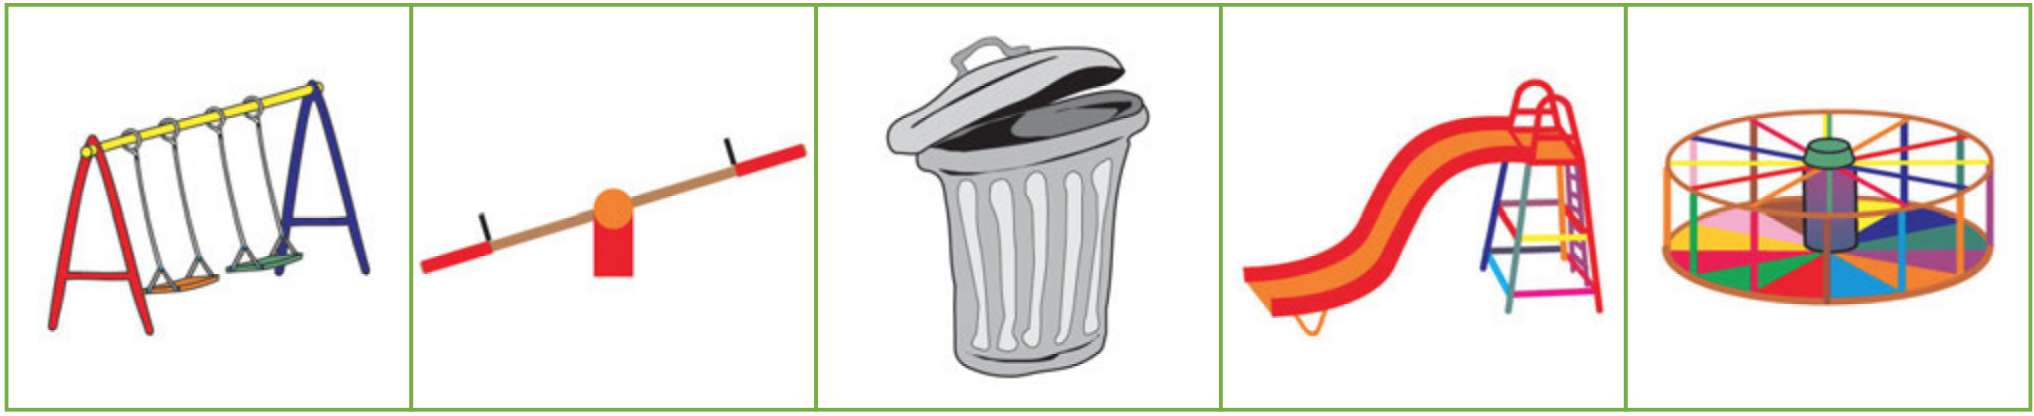
*Match Them Up BRIAN PUT THIS IN STRATEGY

[The ‘Thinking Through’ series edited by David Leat has individual books for Geography, History, RE, MFL, English, Maths, Science and PSHE which all contain subject specific examples.]2. Explore the language of Making Links
*Discuss making links

Extend the language of Making Links
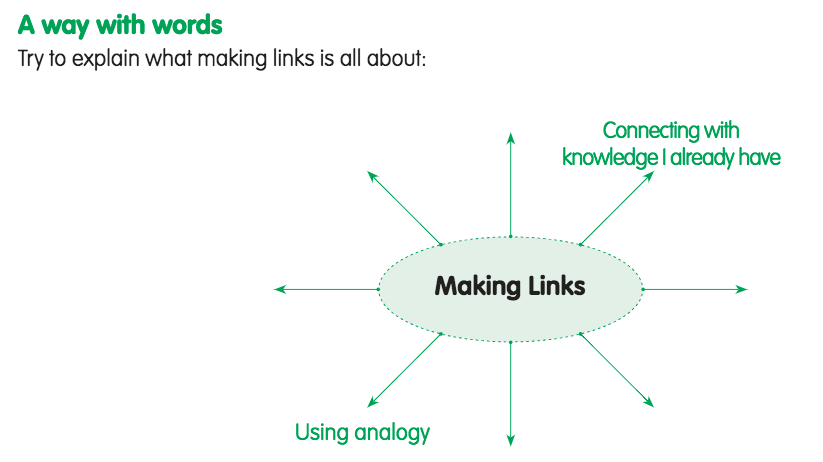
Relate link making to well-known sayings
What do we mean when we say …
3. Use Making Links as a lesson starter
*Similarity and Difference

*Odd One Out


Here is an idea where, by using making links, students will gain an understanding of the content AND will develop a making links habit.
4. Focus on Making Links as a learning strategy
*Visible Thinking Routine
Connect, Extend, Challenge

5. An activity to highlight and strengthen Making Links
*And or So
6. Reflect on Making Links
Make reflecting on Making Links part of everyday lessons
Learning Mats
*A Learning Log to alert students to Making Links across various aspects of their learning lives
NB. None of the suggestions above will lead to instant understanding in students nor instant changes of behaviour. You will need to drip them in over time and keep building and refreshing your language of learning.
Some ideas to encourage an Imagining frame of mind.
1. Make students aware of Imagining
*The Mind’s Eye

Guided Visualisation

Stimulating the imagination
*Capture ideas


Play the prediction game, emphasise mental rehearsal

2. Explore the language of Imagining
*Talk about how things might look, feel, sound.

Expand the vocabulary of imagining
Relate imagining to well-known sayings
What do we mean when we say …
3. Use Imagining as a lesson starter
*Extend imaginative thinking by telling stories

*Trigger imagination with ‘What if …’ challenges

4. Focus on Imagining as a learning strategy
Primary and Secondary
Visible Thinking Routine

5. An activity to highlight and strengthen Imagining
*Imagining through all of the senses . . .

What you are trying to achieve:
6. Reflect on Imagining
*Make reflecting on Imagining part of everyday lessons
Learning Mats
Alert students to how they use their Imaginations
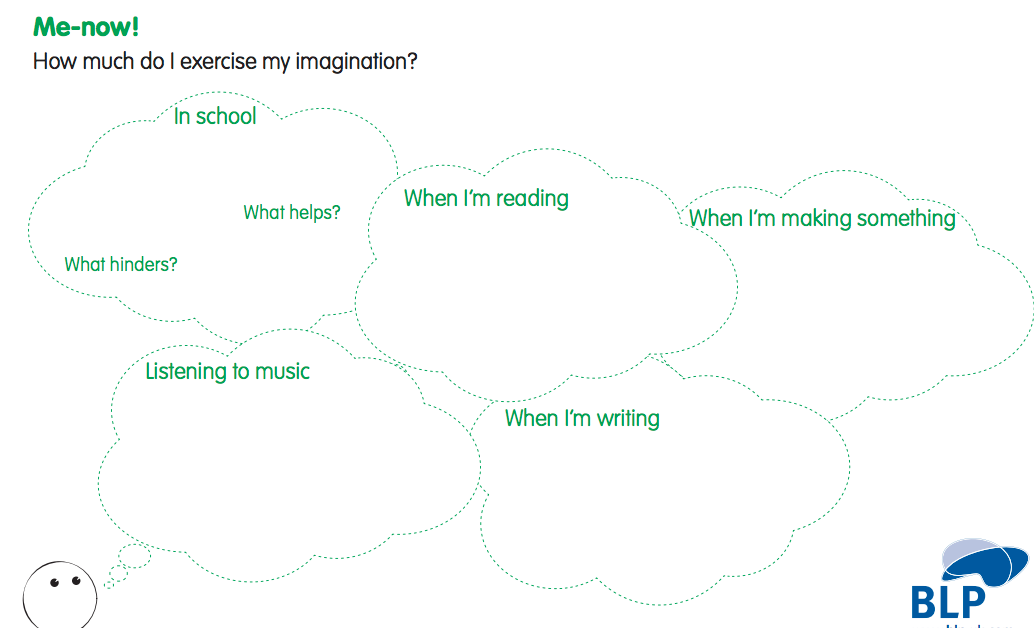
NB. None of the suggestions above will lead to instant understanding in students nor instant changes in their behaviours. You will need to drip them in over time and keep building and refreshing your language of learning.
Some ideas to encourage a Capitalising frame of mind.
1. Make students aware of Capitalising
*Learn from expert interviews

*Use display to share key learning

Explore how things can be used
 Collect a pile of unrelated objects, or ask students to bring in one object each and mix them in random groupings – eg a copper tube, piece of cloth, felt pen, blu-tack.
 2. Exploring the language of Capitalising
*Discuss capitalising
Extend the language of capitalising
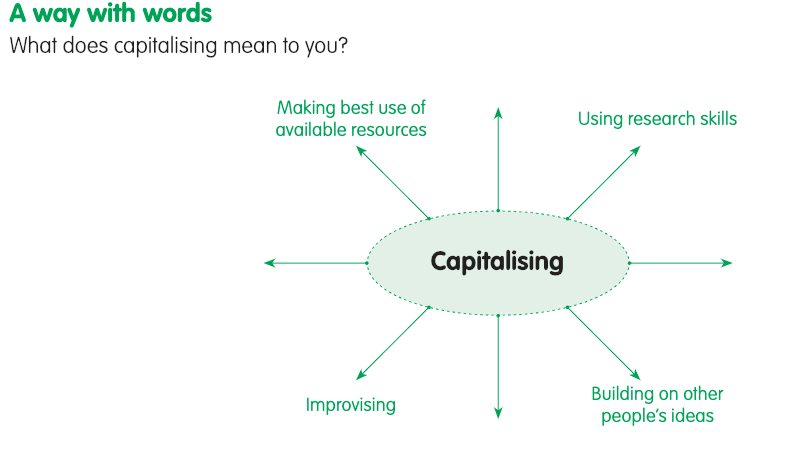
Relate capitalising to well-known sayings
3. Using Capitalising as a lesson starter
*How might we tackle this?
 At the beginning of a session talk with the students about the strategies and things they might use to help them with their learning.
How many uses for . . . .

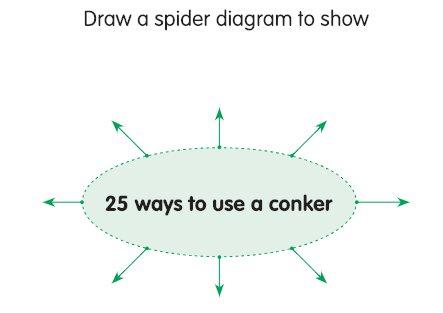
As you develop greater understanding of capitalising you will need to design learning activities which, by their very nature, will deepen students’ tendency to capitalise AND their understanding of the content.
4. Focusing on Capitalising as a learning strategy
Visible Thinking Routine
5. An activity to highlight and strengthen Capitalising
*Icarus All-Sorts
6. Reflecting on Capitalising
*Make reflecting on Capitalising part of everyday lessons
Learning Mats
A Learning Log to alert students to Capitalising across subjects
NB. None of the behaviours above will lead to instant understanding in students nor instant changes of behaviour. You will need to drip them in over time and keep building and refreshing your language of learning.
Some ideas to encourage a Collaborative frame of mind
1. Make students aware of Collaborating
*Give time to think… and share ideas

Introduce games that require collaborative behaviours
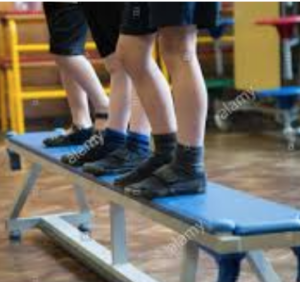
*Use activities to show everyone has a role in success

2. Explore the language of Collaboration
*Explore and use team roles
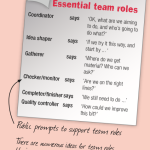
Introduce students to a few essential team roles, for example.3. Use Collaboration as a way of organising learning
Getting ready for teamwork
Try a sharing activity
*Building on the answers of others
4. Focus on Collaboration as a learning strategy
*Visible Thinking Routine
Think, Pair, Share

Offer students a problem or question which is more substantial than simple recall.
5. An activity to highlight and strengthen Collaboration
Stranded!
6. Reflect on Collaboration
Make reflecting on collaboration part of everyday lessons
Learning Mat
*Encourage self reflection on collaboration

NB. None of the suggestions above will lead to instant understanding in students nor instant changes of behaviour. You will need to drip them in over time and keep building and refreshing your language of learning.
Some ideas to encourage a Listening frame of mind
1. Make students aware of Listening
Make pupils aware of listening
*Who said “Sausages”?
Offer ways to focus on listening
What Can You Hear?

Coaching notes
Listening for Inference and Understanding
 Explore sentences spoken with different stress, tone, pace and emphasis, to yield different meanings.
*Become aware of the effect of sounds
Silent Film Show

2. Explore the language of Listening
*Discuss listening and tone of voice.

Expand the listening vocabulary
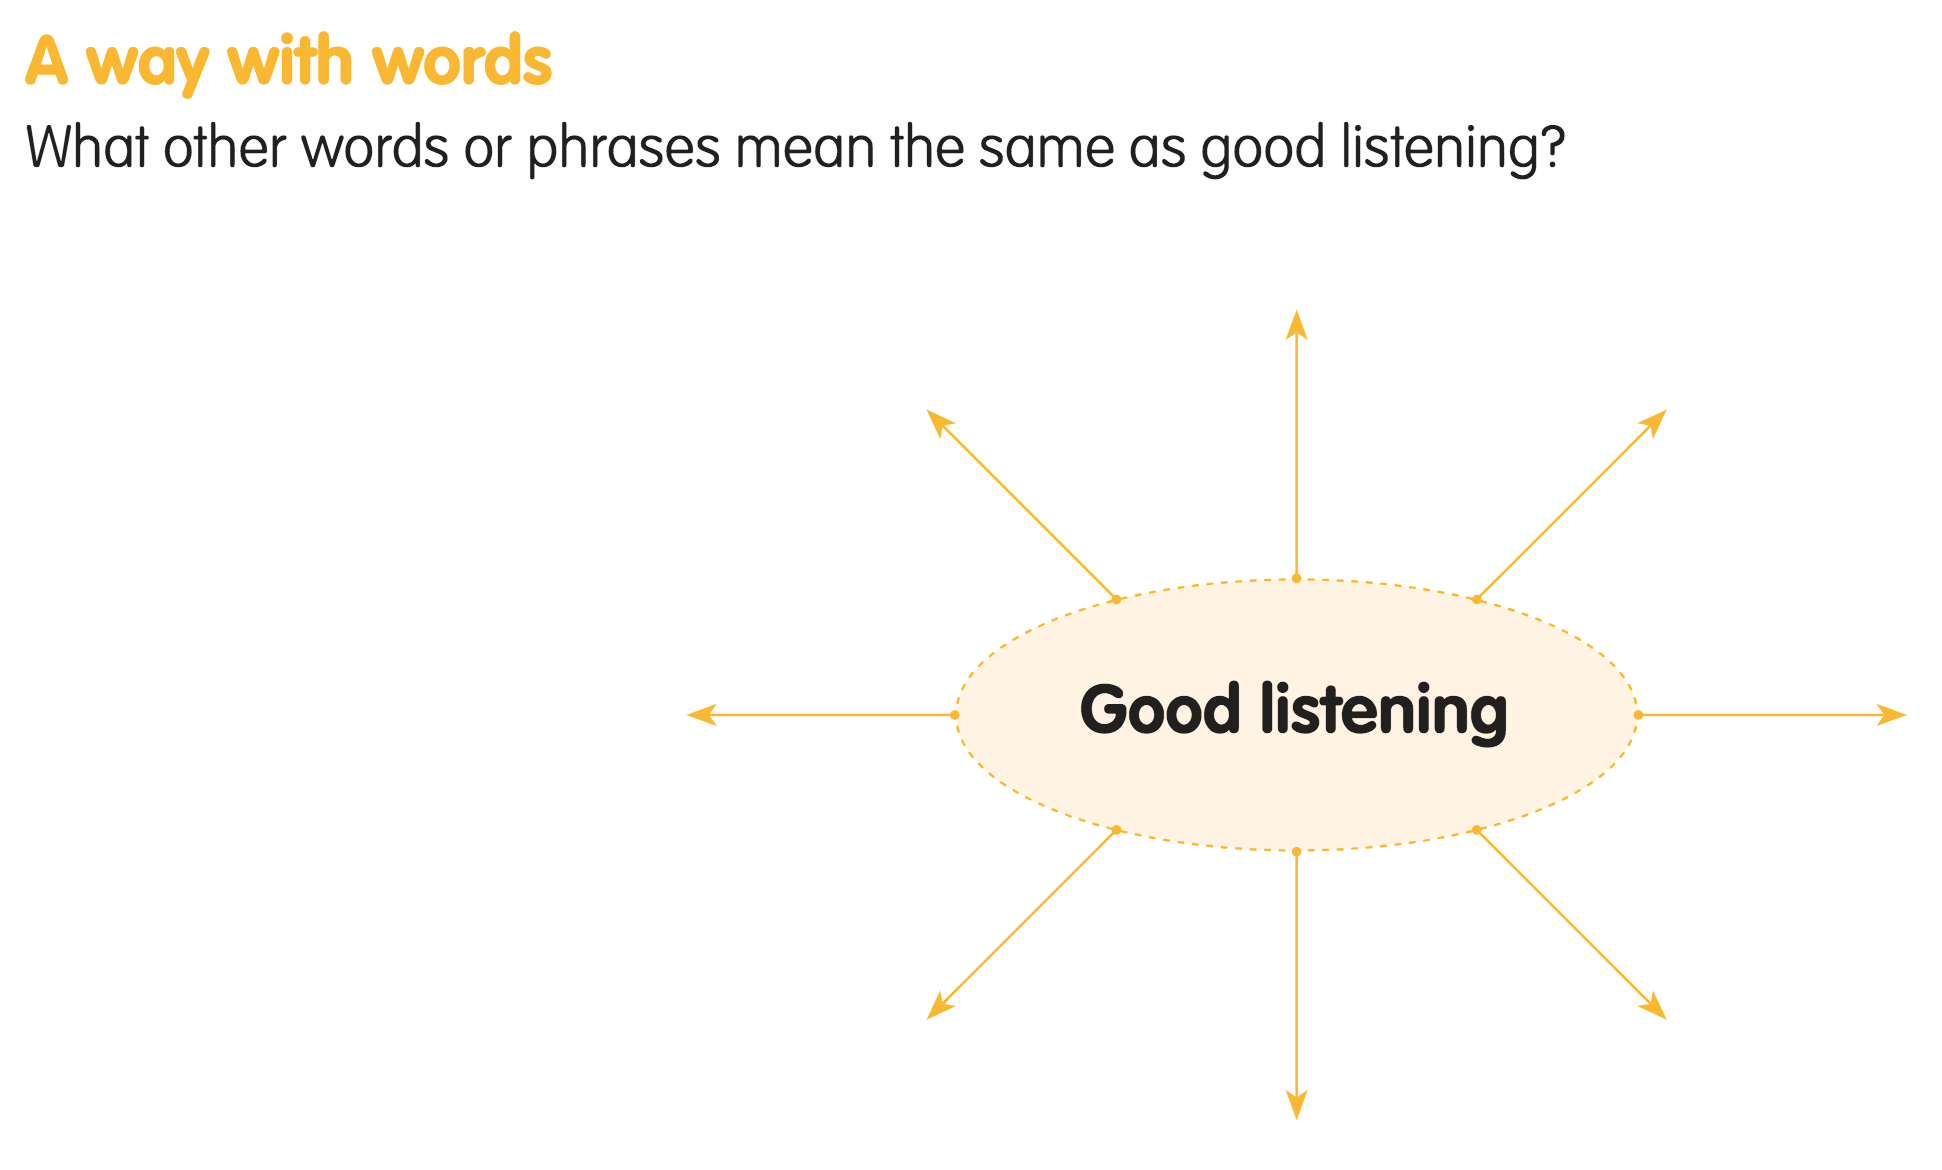
Relate listening to well-known sayings
What do we mean when we say …
3. Use Listening as a lesson starter
*Centring Activities
Something wrong here?
Listen for inference and understanding
As you develop greater understanding of listening you will need to design learning activities which, by their very nature, will deepen students’ tendency to Listen AND their understanding of the content.
Here is an idea where, by using listening students will gain an understanding of the content AND will develop a listening habit.
4. Focusing on Listening as a learning strategy
*Visible Thinking Routine
5. An activity to highlight and strengthen Listening
*Listen and Draw
6. Reflect on Listening
Make reflecting on listening part of everyday lessons
Learning Mats
A Learning Log to alert students to Listening across various aspects of their learning lives
NB. None of the suggestions above will lead to instant understanding in students nor instant changes of behaviour. You will need to drip them in over time and keep building and refreshing your language of learning.
Comments are closed.