Understanding ‘getting better’ at learning. If a parent were to ask whether their child was more perseverant than when they arrived in the school, what would you be able to say? How would you respond beyond, hopefully, yes, or with a bland statement about ‘sticking at things for longer’? What does becoming better look like? How would you know? What evidence might you use and where would this come from? The real point of all we have discussed so far is to shape students’ dispositions for learning; capturing evidence showing students are actually becoming better learners is, therefore, important.
In this section you will find:
- explanations of three aspects of progression – frequency, scope and skilfulness
- charts showing what the phases of growth look like in relation to:
- questioning;
- collaboration;
- perseverance;
- revising.
- thoughts about how you might use progression to enhance your classroom culture.
Understanding progression in learning dispositions
- progression in learning dispositions is a game-changer – for students and for teachers;
- describing the journey from ‘can’t/won’t’ to ‘can/do’, helps teachers to design learning experiences that support students to become better learners effectively and guide it more precisely and helpfully
- progression trajectories add richness and subtlety to the learning language.
- tracking progression motivates and encourages students to put in the effort to continue improving their learning behaviours
Understanding progression provides students with a way of seeing themselves as a learner beyond present academic performance indicators.
+The Big Picture: Getting better at learning - what does it mean?
The Big Picture: What does ‘getting better’ at learning mean?
Supporting students to get better at learning requires teachers to assist them to spontaneously make more, wider, and increasingly sophisticated use of the learning behaviours. Ultimately students need to be able to make these behaviours their own; intuitively see the point of them; call them to mind for themselves when needed, and become ever more skilful in their use. There are three key facets to the growth of learning behaviours – firstly the frequency/how often the behaviour is being used; secondly the range/scope of contexts in which it is used; and thirdly the skilfulness with which it is employed. Getting better = using it more frequently  The first dimension of progression, and easiest to activate, is frequency/how often. The distinction between skill and habit is important – skills are what you can do, whereas habits are what you do do. A skill that is only rarely employed, or only employed when adult-directed, is at best embryonic. Initially the aim is to activate the skill more frequently through direct intervention with a view to reducing the level of intervention as the skill becomes stronger through more frequent use. The target is to develop the skill into a habit that the student employs frequently, without support, as and when the need arises. The message here is to spot students using a learning behaviour and point this out. Getting better = using it in different contexts
  The second dimension of progression relates to the range of contexts within which the skill is deployed. The child who is tenacious and thoughtful on the play station can equally be defeatist and impulsive in the classroom – they have the skills, but fail to recognise that the perseverance that leads to success on the play station is precisely the same outlook that is needed for success in the literacy lesson. Initially the skill is used only in familiar circumstances, but the aim is to help students to recognise and exploit opportunities to utilise their leaning behaviours in new and uncharted territory. The message is to look out for and comment on students using the habit, however tenuously, in different subjects or in the playground. Getting better = becoming more skilled in its use
  The third dimension, and by far the most subtle, is that of skilfulness. While we may start by encouraging students to ask more questions, more often and in different subjects, we rapidly turn our attention to the quality of the questions that are being asked. It is not too difficult to describe the attributes of a high level, sophisticated questioner who is skilled at asking incisive, generative questions, but it is very difficult to map out and sequence the steps between the natural curiosity of a three year-old and the sophisticated skill-set of the consummate question-asker/enquirer. This is the challenge, and why skilfulness is the most complex of the three dimensions. However, once mapped, the impact on how you mentor, set targets, enable self and peer assessment, design tasks, and plan the curriculum etc. is immense. Helping students become more skilled in their learning behaviours is the role of a teacher in learning-friendly classrooms.
1. What you’re aiming to achieve…
..is to understand how the 4 foundational learning behaviours might grow over time so that:
- you can coach learners to become better learners
- you can enrich the language of learning
- you can blend a more precise range of learning behaviours into your lesson planning
- you can help learners to understand how they are growing as learners
1a What learning growth might look like
What can teachers and students look for to suggest whether students are genuinely building up their level of expertise in questioning or collaborating or persevering or revising. What does ‘getting better at persevering’ involve? What might it look like? These examples show the beginnings of deeper thinking about how learning behaviours might unfold and students become more skilled.
- Where are the majority of my learners – closer to the top, or closer to the bottom?
- Is that true for all 4 behaviours, or are there differences between them? Why might that be?
- Do I know any students who are at or close to the top end: What do they do that students at the bottom end do not do?
- Which skills and dispositions need to be developed so that students move increasingly upwards?
Now take a look at each growth diagram that indicate the nature of skills involved.
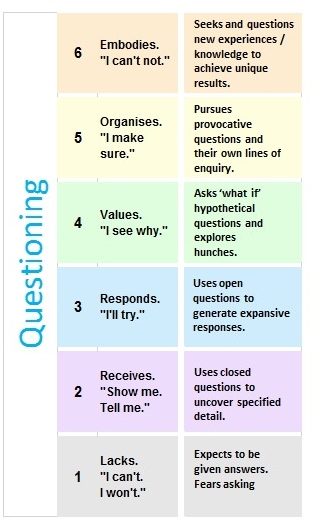
1b Growing Questioning
From the accepting, credulous and uncritical, through to the intensely curious and healthily sceptical, becoming better at questioning requires students to develop their:
- inclination to show interest in and ask about what is around them;
- ability to ask closed questions that find required information, and open questions that open and explore possibilities;
- search skills that enable them to find out for themselves;
- ability to ask questions with sensitivity;
- and most importantly, their inclination to deploy these as and when they are needed.
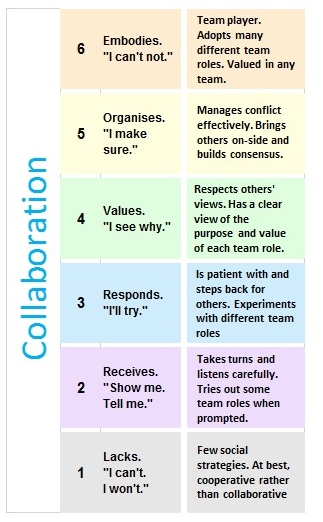
- social interaction skills;
- inclination to contribute their ideas to others and build shared understandings;
- ability to contribute constructively and flexibly to group work;
- team planning skills;
- inclination to reflect on how the team is functioning and how it might function better in future;
- and most importantly, their inclination to deploy these as and when they are needed.
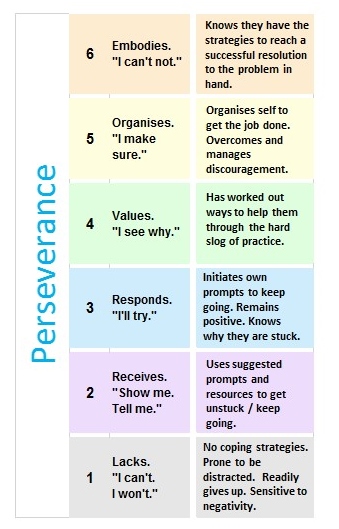
- coping strategies;
- ability to manage their own learning environment;
- appetite for challenge;
- ability to work towards longer term goals;
- and most importantly, their inclination to deploy these as and when they are needed.
- willingness to change;
- understanding of what constitutes high standards and the desire to meet them;
- inclination to monitor learning as it is happening and to evaluate it after it has happened;
- and most importantly, their inclination to deploy these as and when they are needed.
+ The meaning of the phases of development. Important read.
The meaning behind the phases
The phases of growth are drawn from Bloom’s taxonomy of the affective domain.
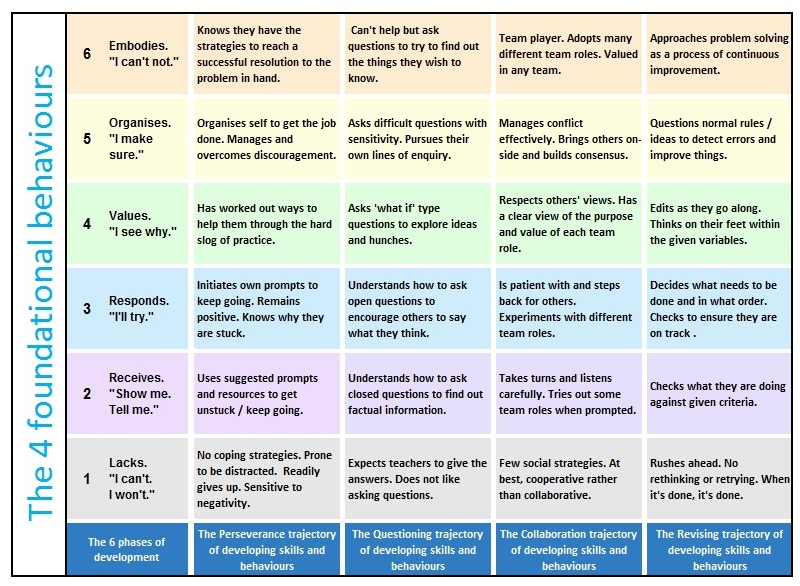
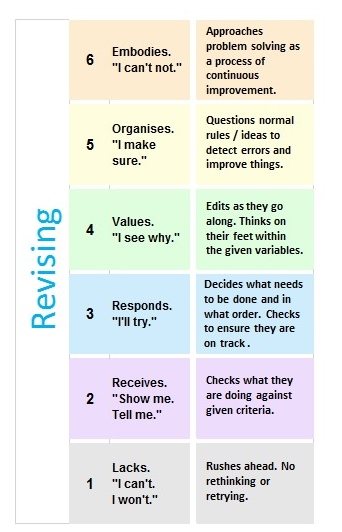
#1 – Phase ‘Lacks’ (Grey) is about not being ready, willing or able to.] In simple learner self-talk it might translate into ‘I can’t, I won’t’. #2 – Phase ‘Receives’ (purple) is about doing something because you are told or expected to. In simple learner self-talk it might translate into ‘Show me. Tell me’. #3 – Phase ‘Responds’ (blue) is about gaining interest and doing things more willingly. In simple learner self-talk it might translate into ‘I’ll try’ #4 – Phase ‘Values’ (green) is a key phase since the student now sees the value of behaving in this way. It’s a win for them; to behave like this is in their interest. It’s in this phase that the behaviour becomes more secure. In simple learner self-talk it may translate into ‘I see why’. #5 – Phase ‘Organises’ (yellow) is the phase in which the student capitalises on this ‘in their interest’ behaviour and gets themselves organised to use it positively. In simple learner self-talk this may translate into ‘I make sure I do’. #6 – Phase ‘Embodies’ (orange), is the phase when the student has made this behaviour their own. It has become part of their character; they can’t not do it and they have become highly skilled in doing it. In simple learner self-talk this may translate as ‘I can’t not do this’. We urge you to see this progression as long term. Some phases will take years for people to work through; some will never be worked through. None of the phases are inevitable. There is a lifetime of development captured here. Nevertheless, the role of a teacher or parent should surely be to encourage and enable this journey.
2 Explore your students’ learning behaviours
Think about a class you know well.
Your class will inevitably contain a few ‘outliers’ – students who seem to have already secured these behaviours, and others who don’t yet appear to have made a start on the journey. Ignore these outliers for the moment, and think only about the majority of your ‘average’ students.
Ask yourself:
- For each of the 4 trajectories, which number from 1 to 6 best describes the majority of my class at the moment?
- Is any trajectory at significant variance from the others? Why might this be?
- When you meet as a team, talk about the youngest students in your school – which number best describes them for each trajectory?
- Then repeat for the oldest students in your school.
- What is this telling you about the progress your students make as they pass through your school?
- If your students appear to be making minimal progress, why might this be?
- If your students are making progress, why is this happening? Is it simply a combination of chance and ‘getting older’ – ie that these skills inevitably improve, unplanned and unintentionally, with age? Or are there interventions that the school makes to support this progress?
- How far along these trajectories would you like your students to be when they move on to the next stage of their education?
- What do you currently do to help your students to make progress along these trajectories?
Now think about some individual students:
- In relation to the trajectories, where do your high performing students tend to sit – towards the top or towards the bottom?
- What about your poorer performing students?
- A chicken and egg question: Do your high performing students use more learning behaviours because they are high performing, or are they high performing because they use more, sophisticated, learning behaviours?
Distil your thinking:
- How does this connect with what you already knew about your students?
- How has it extended your thinking?
- What questions do you now have?
Make a note of these thoughts and take them to the next Professional Learning Team meeting.
3. Focus what you do on the basis of understanding progression.
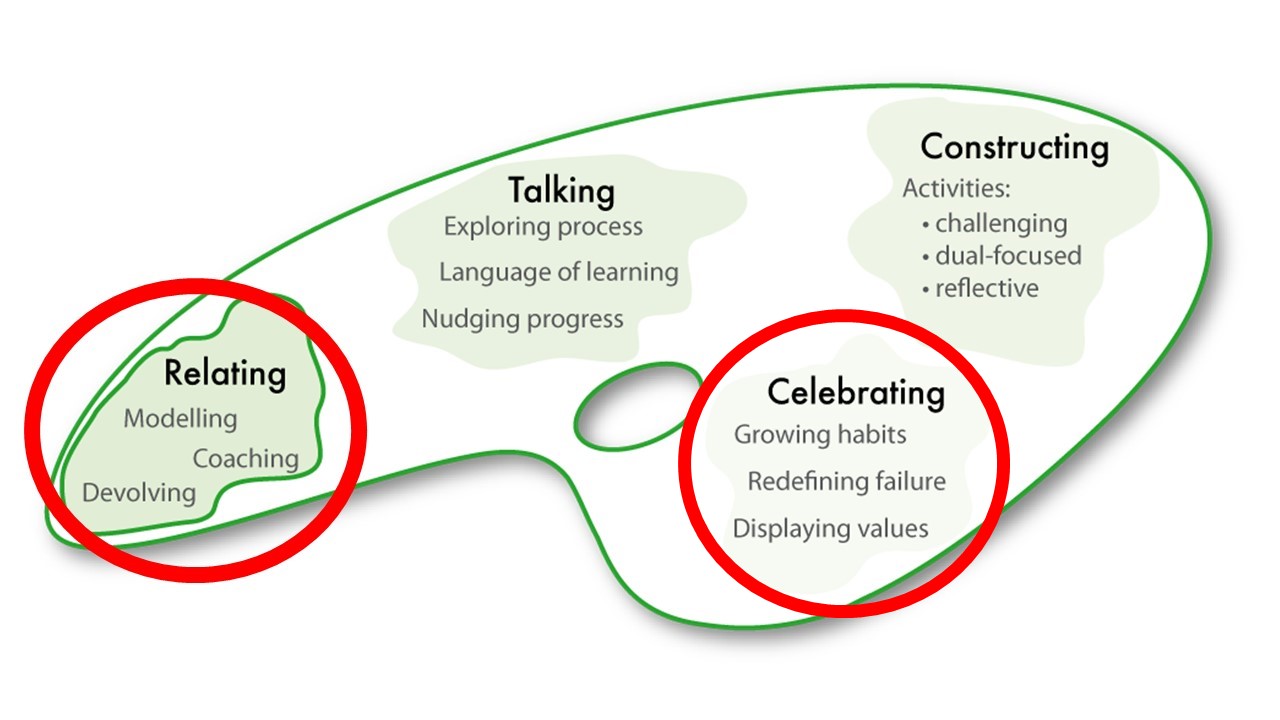
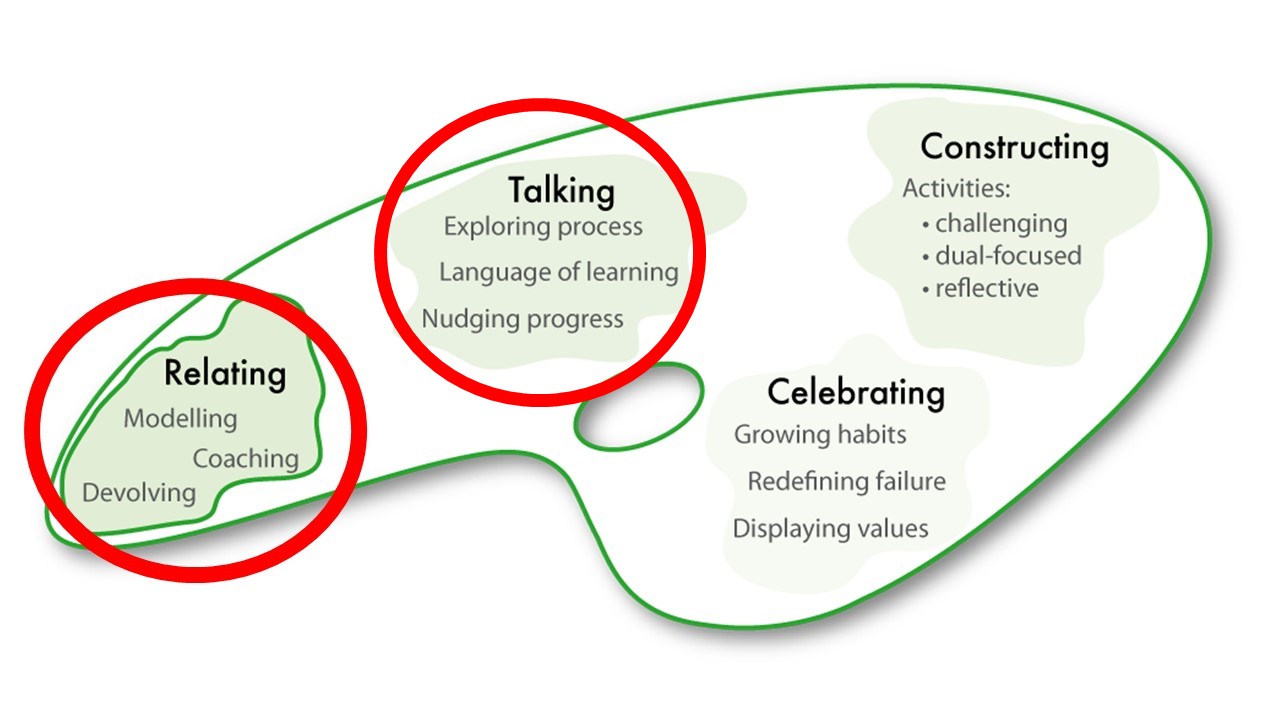
An understanding of progression will help to focus what you decide to do differently in your classroom. You might want to give more responsibility to your students or to use a coaching approach more often. You may decide to change the way you construct your lessons or offer feedback or talk with students. By this stage you are using the different teacher actions to encourage learning behaviours but now you can also select your actions in order to promote improvement or growth in the behaviours. Spend time to think about where your learners are on the growth trajectories so that you can better decide what you do in order to stretch their learning behaviours.
3a Link your changes in practice to the growth trajectories
Consider the Revising trajectory that you met in 1e above. Look at the grey, purple and blue cells. If a student ‘rushes ahead and doesn’t consider rethinking or retrying’ (grey) you will want to help them to ‘check what they are doing against given success criteria’ (purple). You could help them by developing a wall display about the importance of checking. You might talk about and emphasise checking criteria when you model how to do something. You could design a lesson to engage students in creating their own list of things to check before handing work in for marking. And so the possibilities go on from all the different avenues you could use to move students forward. How would you help students to the next level (blue) ‘decide what needs to be done, in what order, and to keep an eye on progress’? In other words, the actions we take, from the range identified in the teachers’ palette, should also be differentiated according to where learners are on the growth trajectory. To get a feel for what this looks like in practice take a look at the next resource. Here you will see a range of things teachers could do, influenced by the students’ stage on the progression chart. Open the toggle box and explore!
Teacher ideas to progress development for 4 key behaviours. A really helpful resource!
Explore how teaching ideas build the phases of development for all 4 key learning behaviours
Click on the cell to see the associated teaching idea. Some you will have seen earlier or elsewhere, but many are newly introduced here.
Teaching Ideas
Five big shifts to get you started with Perseverance.
Ask yourself – How might you:
Support and encourage pupils to step into risky, challenging areas of learning;
Offer students the skills and motivation to create and achieve their own goals;Help students to overcome and control the negative emotions of learning;
Build reflection in and on learning a regular feature of classroom activity;Nourish, guide and support students to become confident independent learners.
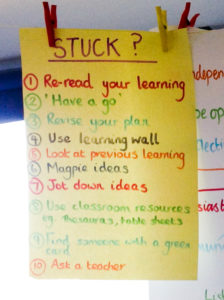
Display stuck prompts in all shapes and sizes
These might include:
- Quick reminder sheets on group tables
- A special Stuck Table with plenty of resources
- Stuck Prompts

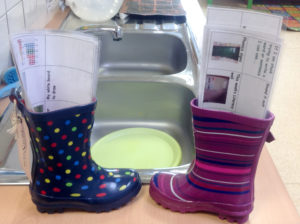
- Containers ( e.g. wellies) holding laminated reminders of things to do. Spots=numeracy. Stripes=literacy
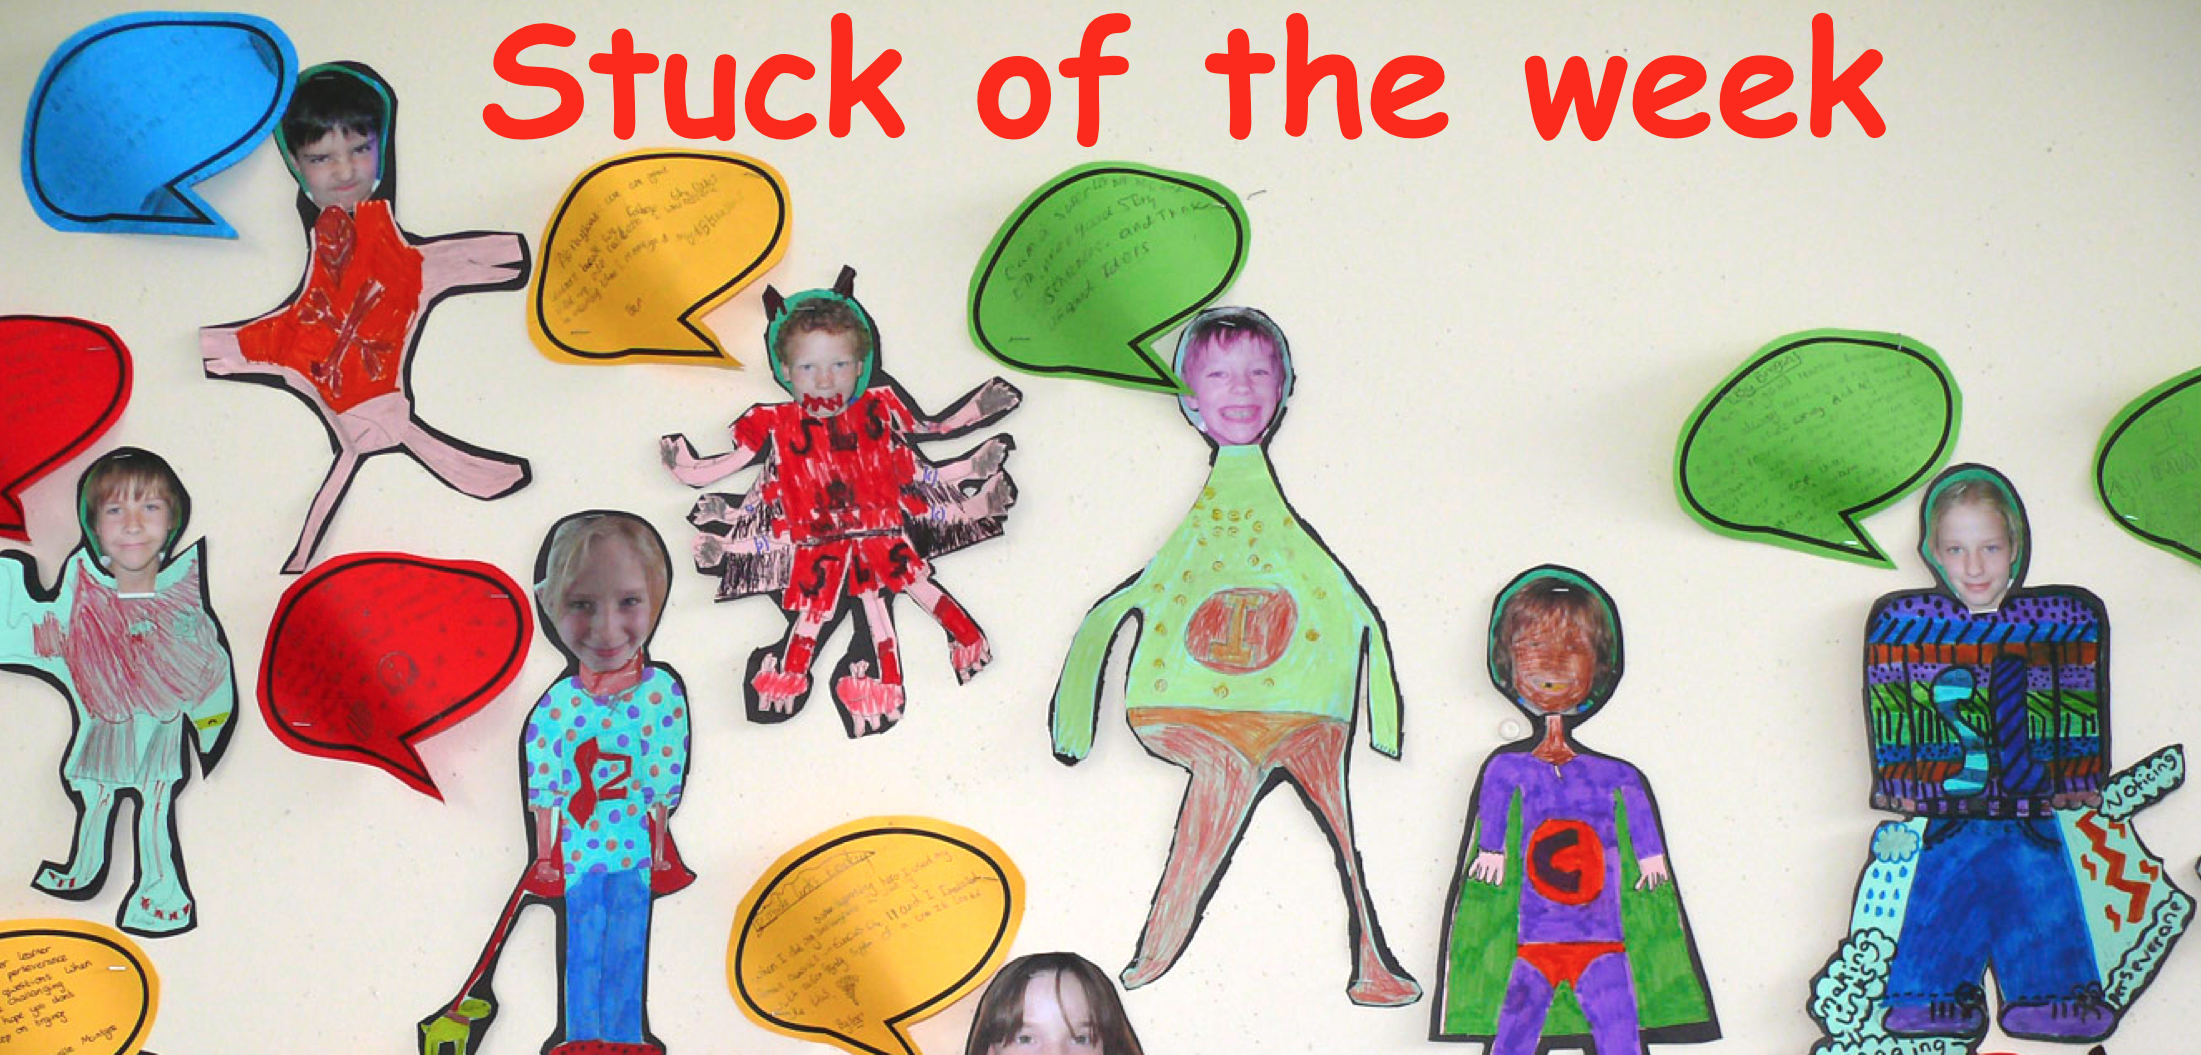
- Stuck Walls with multiple displays of Stuck Posters, ‘stuck-of-the-week’, the Learning Pit and so forth.
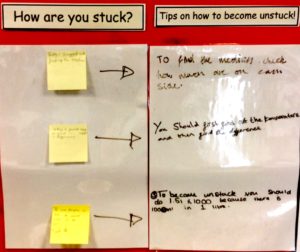
- During lessons students post up stuck problems and other students suggest solutions ( see below)
- Ensure students are involved in creating stuck prompts.
Re-frame challenge: explore learning how to overcome a struggle
The Learning Pit: from struggle to success Use the ‘Learning Pit’ as a means of opening up a conversation around the feelings involved with being stuck, and the journey to overcoming difficulty – the struggle. It is essential that students know: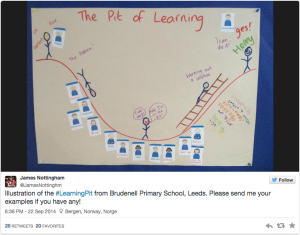
- that the ‘pit’ is only one staging post on the learning journey
- they can get out by using ‘stuck strategies’ and tools
It is also worth noting that the pit is not necessarily inevitable for all students in all learning – some will fly over the pit in some topics or curriculum areas. The ability to cope with and overcome difficulty and challenge is a key aspect to becoming a successful learner. James Nottingham introduced the idea of the Learning Pit as a way to explain that struggling is part of learning and that if we are to understand something we need to struggle with it first. Students move from unconsciously incompetent (an emotionally ‘safe’ area before learning), to consciously incompetent (the emotionally tricky “pit”), to consciously competent (the far side, after the learning has happened). Find out more by visiting: https://www.learningpit.org/
Introduce and model different types of being stuck
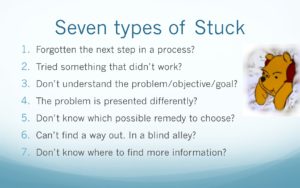
In this phase it may be useful to identify and model several forms of being stuck. What sort of stuck is it? Do different sorts of being stuck call for different strategies? Seven types of stuck:
- Forgotten the next step in a process?

- Tried something that didn’t work?
- Don’t understand the problem/objective/goal?
- The problem is presented differently?
- Don’t know which possible remedy to choose?
- Can’t find a way out. In a blind alley?
- Don’t know where to find more information?
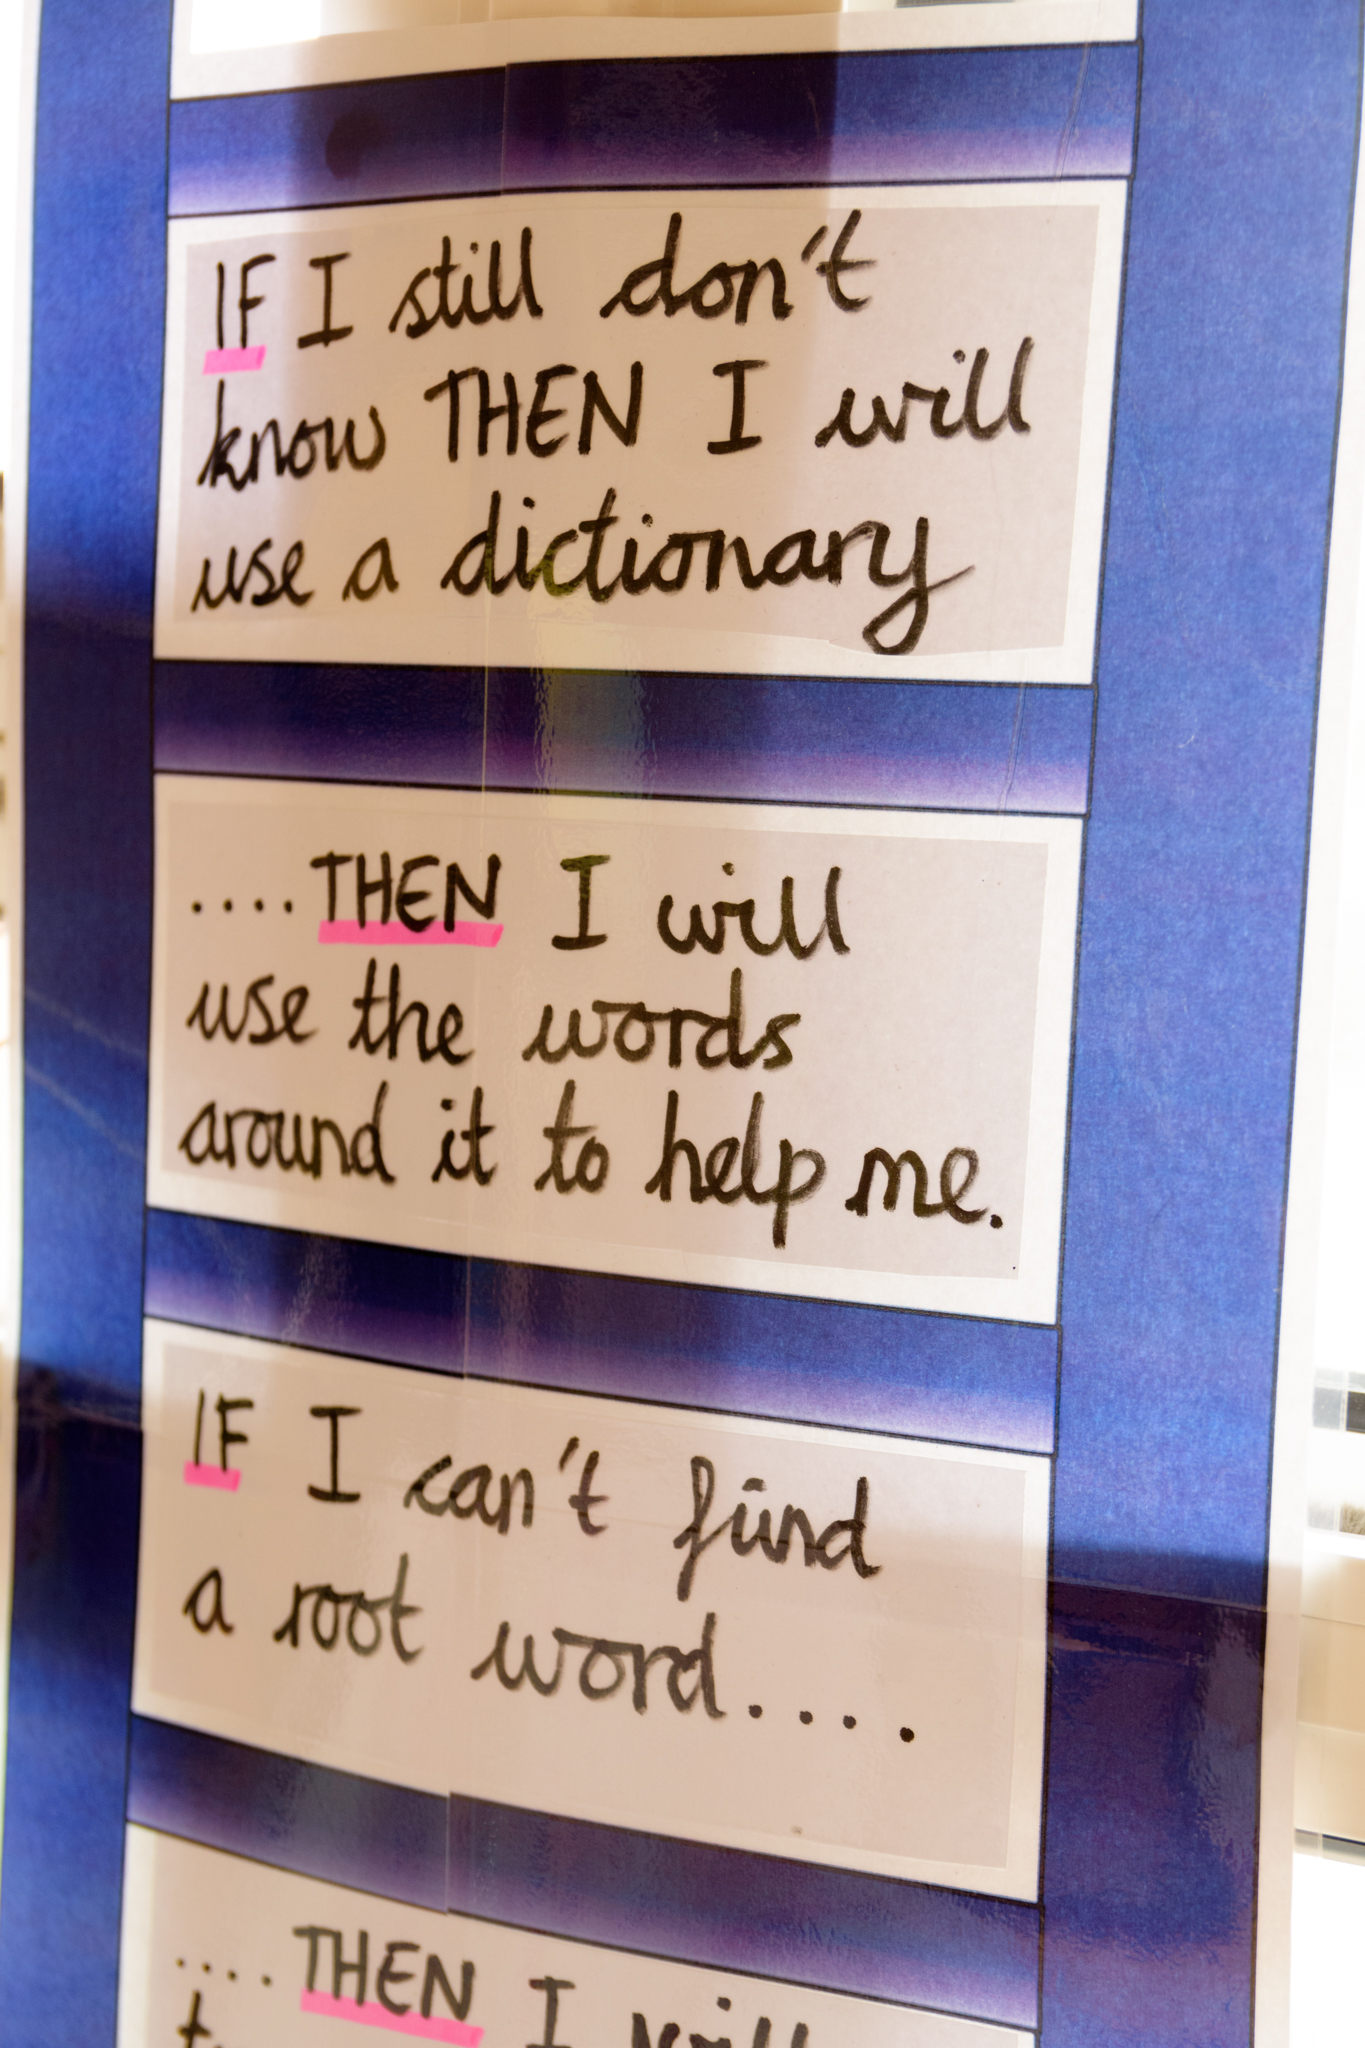
You could turn any one of these questions into an ‘If, then’ statement:
- If I have forgotten the next step in a process, then I’ll…
We leave it to you to discover other ways of being stuck with your students and to model your way out of them.
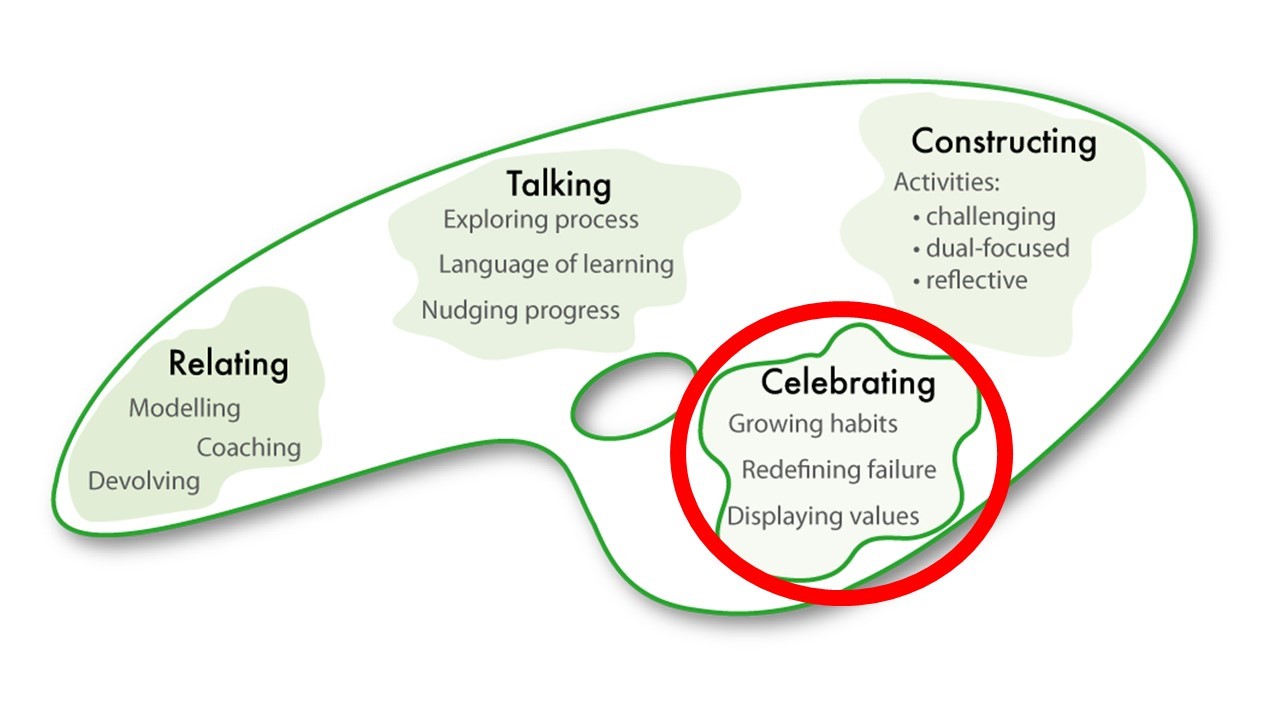
Display a miscellany of learning values
In a learning friendly classroom, learning processes and behaviours are made visible in all sorts of ways. You might find several ways of acknowledging learning on the walls:
- useful prompts for use when stuck
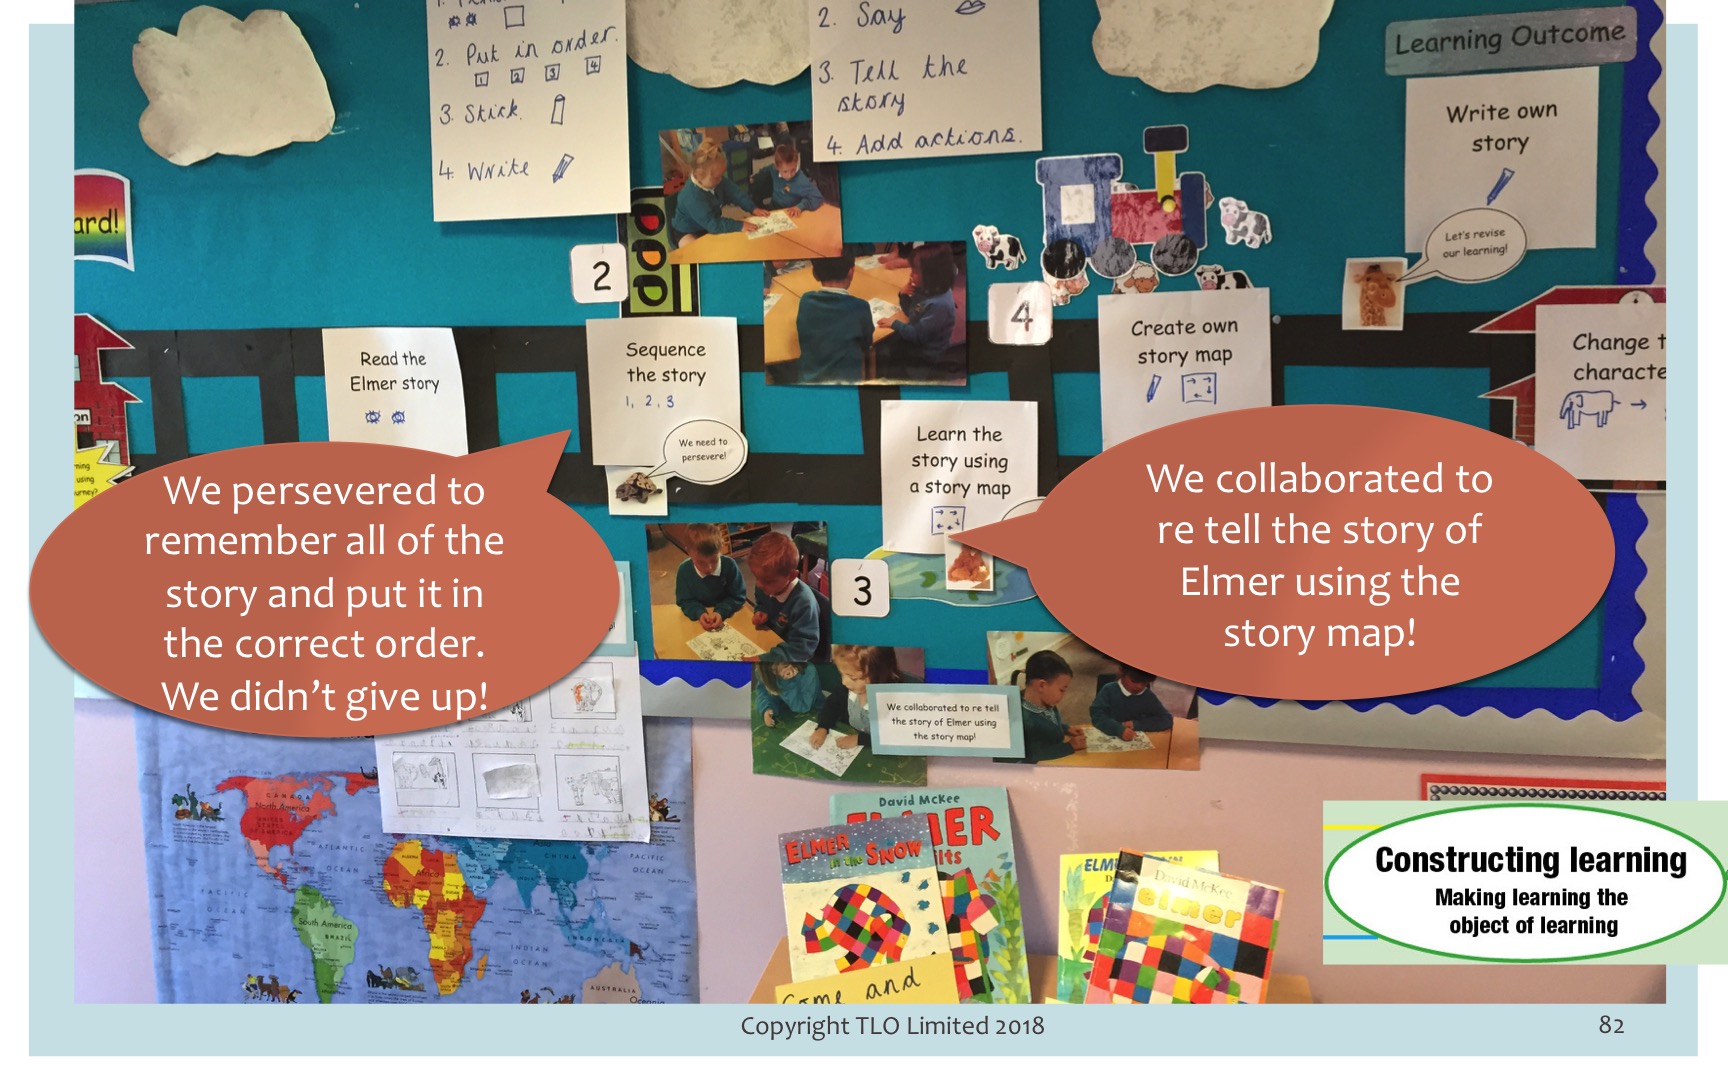
- displays of students’ efforts showing drafts and examples of work in progress to emphasise the idea of learning as a process
- a humorous display of mistakes of the week
- a five point scale students have devised about levels of distraction
- some If -Then statements to encourage habit formation
- whiteboard display of icons showing the learning behaviours they are focusing on just now
- photographs taken by some of the students which capture their peers using ‘stuck strategies’
- statements showing what super-powered learners say
- a ladder or learning line showing descriptions of how students might feel about the activities and their learning stretch just completed (low, good, high, overstretched) around which the students gather at the end of the session to reflect on their efforts.
Five big shifts to get you started with Questioning
Ask yourself – how might you:
Value and praise good questions as well as good answers;
Make it safe for people to disagree…see it as an interesting situation from which to learn;
Put enquiry mindedness on display…share your enthusiasms, display unfinished lines of enquiry;
Develop open-ended challenges;
Build your lessons from intriguing questions.

Questions on display. Make the classroom question friendly.
Create question walls in the classroom to illustrate and prompt questioning. Display, for example:
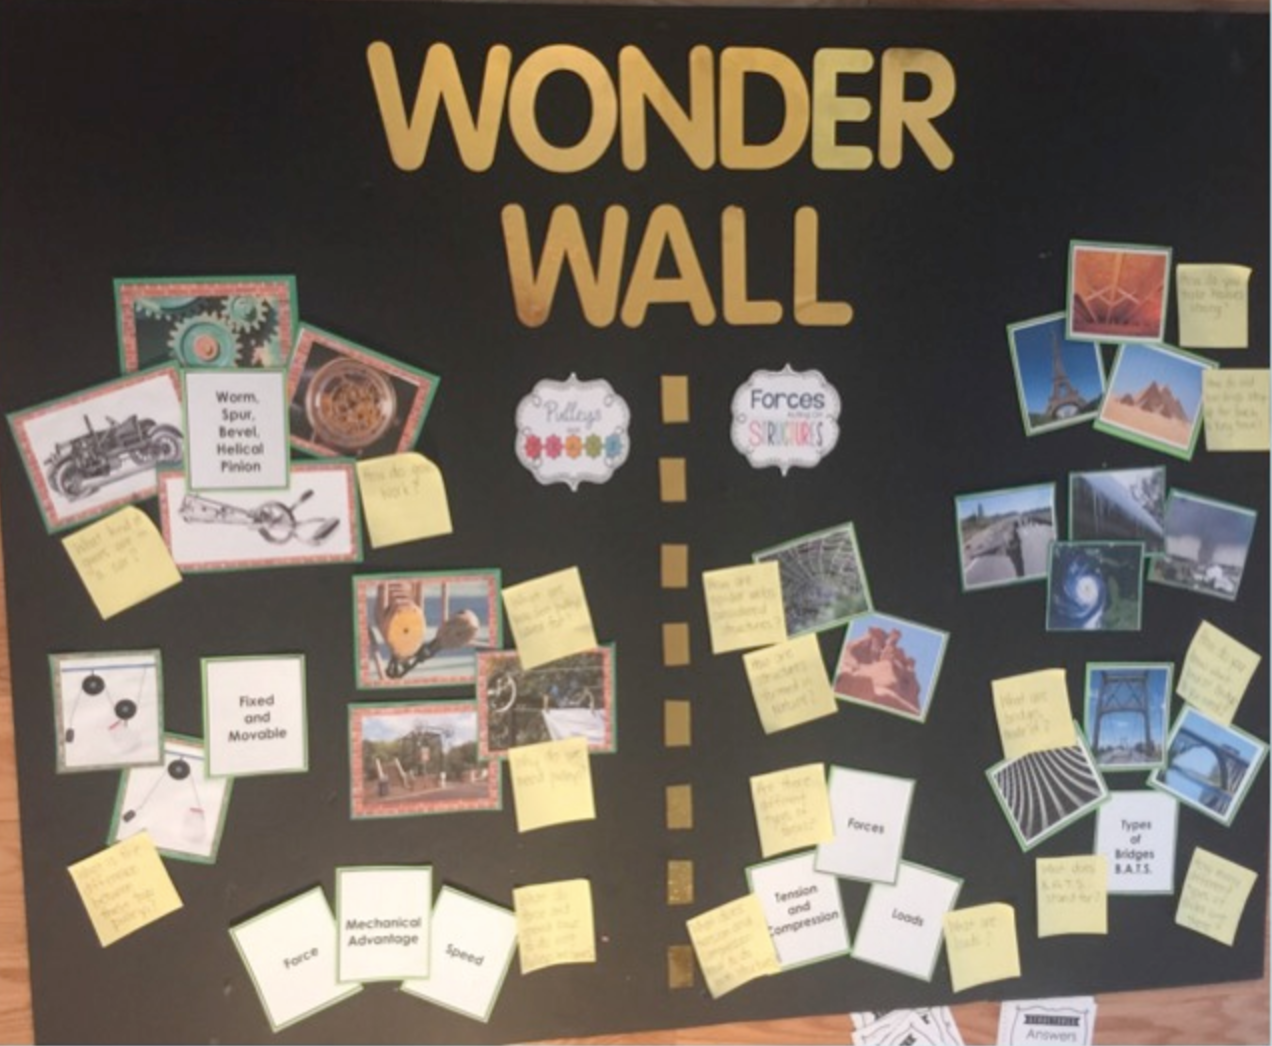
- Student-posted questions about current topics that need resolution.
- ‘The Question of The Day’
- Different types and purposes of questions.
- Questioning routines that the class have defined.
- A lexicon of questions for use when exploring and enquiring.
- A list of questions for use to get started, or unstuck.
- Annotated student work and pictures to provoke questioning.

Think, Puzzle, Explore… Visible Thinking Routine
Think, Puzzle, Explore is a visible thinking routine that encourages students to connect to prior knowledge, to stimulate curiosity and to lay the groundwork for independent inquiry. The 3 questions are:
- What do you think you know about this topic?
- What questions or puzzles do you have?
- How can you explore this topic?
For more detail on Think/Puzzle/Explore visit the Visible Thinking website

Build a three-level questioning habit
‘ReQuest’ is a structured process for deepening questions. For example, start with the painting The Arnolfini Wedding by Jan van Eyck:
- On-the-line questions: ask questions about the picture for which the answers can be seen just by looking closely at the picture: ‘How many candles are there?’ ‘What kind of room is it?’ ‘What is on the wall behind the people?’
- Between-the-lines questions: questions whose answers can be inferred by looking at the picture: E.g. ‘What is the relationship between the two people?’ ‘How long ago was the picture painted?’ ‘What time of day is it?’
- Beyond-the-line questions: questions whose answers need to be elicited by making interpretive links from the picture: E.g. ‘What did the artist think of his subjects?’ Is the number of candles significant?’ How does perspective work in the painting?’
Where in the curriculum might you use this technique? How might you translate it for everyday use?

Socratic Questioning
Socrates believed that questioning was at the root of all learning. The six steps of Socratic questioning create a critical atmosphere that probes thinking and gets the students questioning in a structured way. There are six main categories:
- Q1. Get your students to clarify their thinking, for instance: “Why do you say that?” ….“Could you explain that further?”;
- Q2. Challenging students about assumptions, for instance: “Is this always the case? Why do you think that this assumption holds here?”;
- Q3. Evidence as a basis for argument, questions such as: “Why do you say that?” or “Is there reason to doubt this evidence?”;
- Q4. Viewpoints and perspectives, this challenges the students to investigate other ways of looking at the same issue, for example: “What is the counter argument for…?” or Can/did anyone see this another way?”;
- Q5. Implications and consequences, given that actions have consequences, this is an area ripe for questioning, for instance: “But if that happened, what else would result?” or “How does… affect ….?” By investigating this, students may analyse more carefully before jumping to an opinion;
- Q6. Question the question, just when students think they have a valid answer this is where you can tip them back into the pit: “Why do you think I asked that question?” or “Why was that question important?”

Develop Rights and Responsibilities
Work in pairs and small groups to suggest a charter of matching rights and responsibilities or ground rules for collaboration. If everyone has a right to have their voice heard, everyone also has a responsibility to listen attentively to others and wait until they have finished speaking. What else might be important and why?

Assign Group Roles
Group roles (older students and in to KS3)
With older students you might want to consider the group roles identified by Belbin. At this stage, students are probably looking only at the ‘To Do’ column, and the language may well need to be made age-appropriate. Also, think about whether it is wise to introduce all of these roles at the same time. If they are to be phased in, the most sensible/recommended order is: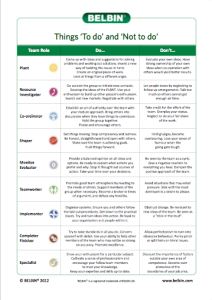
- the people orientated roles first (coordinator/team-worker/resource-investigator),
- the action orientated roles next (shaper/implementer/completer-finisher), and
- finally the thought orientated roles (plant/monitor-evaluator/specialist).
Teamwork detectives
Use teamwork observers to watch a group in action and to feedback on what they have seen. Depending on your students, you might need to offer a checklist of behaviours that will help to focus the observation and feedback.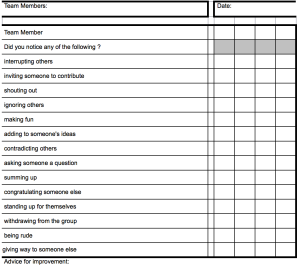

Establish ground rules for dealing with conflict
Agree with your class a routine to be followed when conflict arises, and ground rules for how students should behave. This could form the basis of a display to help students to remember what they have signed up to do. You might end up with a variation on . . . . Resolving Conflicts – Without Fighting
- STOP Don’t let the conflict escalate.

- SAY What the conflict is about.
- SAY What each of us want.
- THINK of positive things we could do.
- CHOOSE a positive option that all of us can agree on.
- ASK someone for help if we can’t agree
Ground Rules
- Listen to each other, try to understand how others feel
- Take turns, don’t interrupt
- Say how you feel and be truthful
- Brains, not hands
Five big shifts to get you started with Revising
Ask yourself – how might you:
Harness display to illustrate that first attempts are rarely the finished article;
Ensure that students act on your feedback and do things differently next time;
Encourage students to monitor how things are going, and change tack if necessary;
Encourage students to evaluate the extent to which they have met the required standards;
Deliberately create situations that require a change of mind.
Talk about and have students create success criteria
Make it clear to students what you are looking for in a piece of learning and give them opportunities to check their ‘work ‘against the criteria, either individually or in pairs. Ensure the criteria are linked to the original learning intention. Knowing what is expected encourages students to stay on focus and to revise their work to meet the criteria. Invite students to create success criteria themselves in order to encourage ownership. Include
- what students should know
- how much, and how, they should include opinions, judgements and their own thinking
- what skills they should be able to demonstrate
- how to link the outcome to the original learning intention.

Using ‘Could be’ language
The importance of using ‘Could-Be’ language is well researched. It encourages more genuine engagement with what is being taught; how students will question and solve problems more readily if knowledge is presented as provisional. It’s about shifting the tone to more tentative, less cut and dried.  The opposite is ‘Is’ language which positions the learner as knowledge consumers where their job is to try and understand and remember. ‘Could be’ language immediately invites students to be more thoughtful, critical or imaginative about what they are hearing or reading, to explore other possibilities and potentially revise their viewpoint. Could be language includes phrases like; In most cases; may include; may on occasion; wide variety; could be; probably; possibly; most often; some people say that; there are other ways; one of which…. For more on using ‘could be’ language, see page 69-71 in The Learning Powered School

What do you see here?
 Use this type of lesson starter to frame students’ minds to be ready to adjust their point of view, to change their mind or revise their ideas. The technique, illustrated here through the picture of a dog leaping over First World War trenches, can be applied to any image where there is some kind of unexpected juxtaposition of conflicting aspects within the same picture. The purpose is to draw students into speculating about various parts of the image before revealing the full image. This will necessarily require them to revise and build their first impressions. The underlying message is that new information often forces us to change our original understandings.

Prize second and third attempts over the first
 Give students opportunities to make improvements and refinements to ‘completed’ work. Importantly, value the improvements at least as much as the first attempt. Discuss with students whether the ‘mark’ should be for the first attempt or the final attempt.
4. Redesign your practice
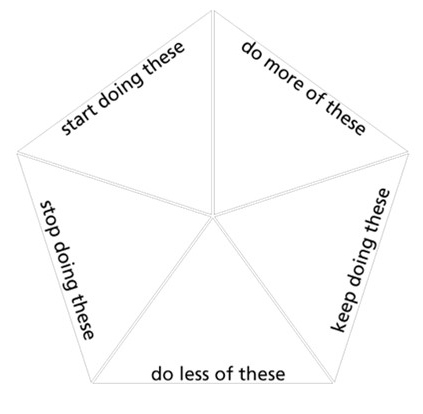
Take a look at a few more ideas you might want to try on the Stop/Start board. Take it steady, moving from 4 foundational behaviours to the growth trajectories is a fairly big shift so it’s worth moving forward slowly and thoughtfully.
What do you think?
- which of the ideas appeal to you most?
- can you see ways of incorporating these into your practice?
- which would make the biggest difference to your students?
- which would make your life easier?
- things you want to start doing
- things you think you need to stop doing ( that’s harder)
- things you want to keep doing
- things you want to do more often
- things you want to do less
Take your filled in pentagon to your next Professional Learning Team meeting.
6. Talk, support and plan with colleagues
Your Professional Learning Team will give you the support you need to develop your practice. This will support you in converting the information and ideas from the online materials into “lived” practices in your classroom.
Learn with colleagues by;
- kicking around ideas from the online content,
- unpacking it’s meaning when it’s unclear,
- considering what’s do-able and appropriate for your students
- making plans for what and how you might incorporate the ideas into your practice
- sharing and unpacking what you have tried in the classroom
- relating your triumphs and tribulations
- supporting colleagues through their changes in practice
- reflecting on what you hope you might do, or have done, differently
The format of the agenda below is based on research into teacher learning communities by Dylan Wiliam, of Assessment for Learning (AfL) fame. Teacher learning communities are the engines of teacher development.
Learning Team meeting agenda
Session agenda
- Agreeing objectives and agenda (5 mins)
- Reporting from colleagues about how previous ideas have worked (15 mins)
- Re-capping the online materials (10 mins)
- Deciding what’s to be done across the school (5 mins)
- Personal Action Planning (20 mins)
- Evaluating the meeting process (5 mins)
1. Session objectives: What do we want to achieve? (5 mins)
For example;
- feel confident about working as a team
- learn from what and how previous ideas have worked in classrooms
- feel confident to apply ideas from online materials in the classroom
- decide which strategic issues everyone needs to apply in their classroom
- plan some do-able shifts in classroom practice
2. Reports from classroom enquiries (15 mins)
Explore;
- what was tried
- how and why did it work?
- what would we change to make it work better?
- how hav students reacted?
- longer term benefits for students
3. Recapping on-line materials: What the materials made us think (10 mins)
Think about:
- which would benefit your students as learners
- the extent to which the ideas are realistic
- how students might react to the ideas for activities, routines, displays.
- the progression charts
4. Planning what to do across the school. (5 mins)
Decide
- Are there any ideas that we should all adopt as whole school strategies?
- Should such ideas be woven into school policies?
5. Personal action planning. What am I going to do? (20 mins)
Think about what you are trying to achieve.
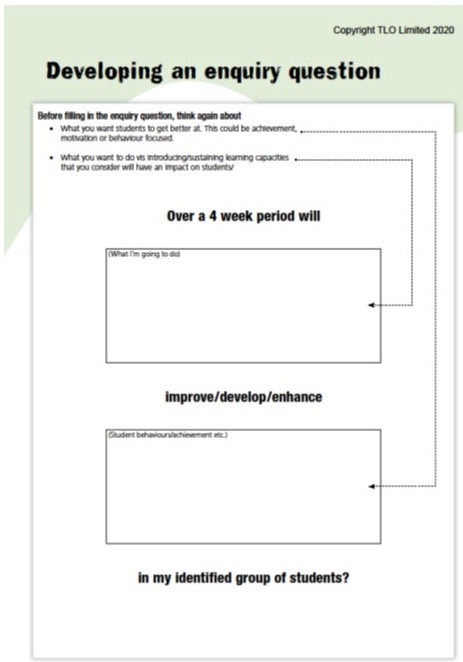
Gain more value from a plan by creating it around a question. Why a question? Because this is an enquiry, you want to find out if something will change (student behaviour) when you change something specific. Think of it like this:
If I do XXXX will it improve/develop/enhance YYYY?
This is the crunch question. Students are unlikely to change unless your behaviour changes! Visualise how you want your students to be and then think about what you might do, or say, or model, or celebrate, or whatever…. differently to bring about this change in students. Developing an enquiry question – .pdf The learning enquiry plan is a record of what you intend to do. It takes your enquiry question from what to how. Remember;
- you can adapt the activities/ideas that you chose to ensure they meet the needs of your students;
- make the plan specifically focus on development;
- concentrate on no more than three actions;.
- decide how to map your actions over the next three or four weeks;
- It’s useful to think about what you are going to do less of to make room for the changes.
The format below may help you think through the planning process. You can fill in your Personal Action Plan using the word document version.
- see yourself doing differently?
- hear yourself saying more often, with greater commitment, more effectively?
- look out for in order to find out which approach best suits most students?
- feel less stressed about? What will indicate that?
- monitor to make sure more meta-cognitive talk becomes established?
Changes you expect to see in your students. For example do you expect students to:
- develop an understanding of what ‘getting better’ means;
- understand their relative learning strengths and relative weaknesses;
- identify an area for learning development;
- other.
Noting such changes will motivate you to continue with your experiments because the changes in students are almost always positive. The plan represents a promise to do it. This promise helps you to keep the plan as a priority in your mind.
6. Evaluate team session: How did we do as a team? (5 mins)
- Did we achieve our objectives?
- Are we comfortable with what we are trying to achieve?
- Any concerns at this point?
- Next meeting date and time.




_1.jpg)

Comments are closed.